Measuring a room for new flooring is a fairly simple process as long as you follow a few basic guidelines. The only tools you should need for this job are a tape measure, pen or pencil, paper and a calculator.
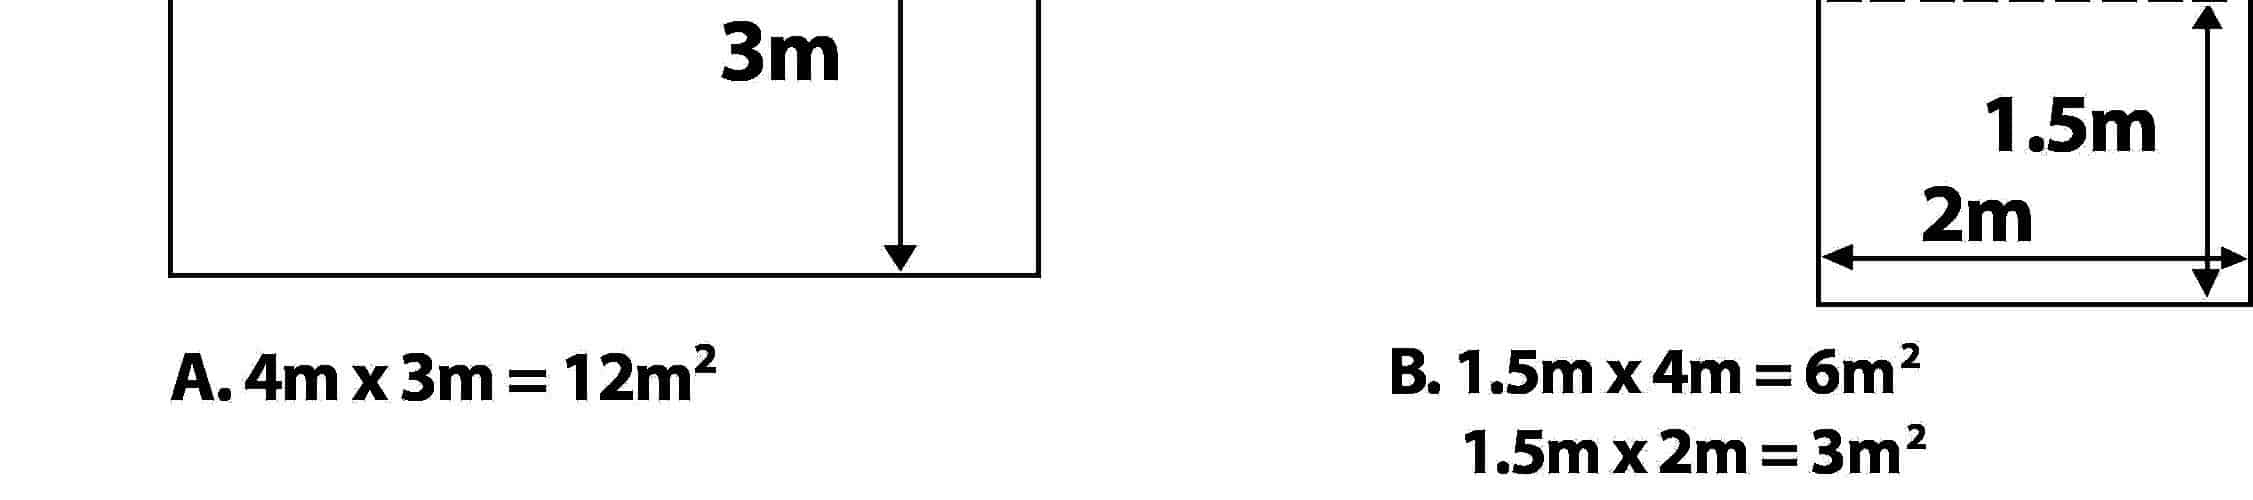
1. Very few rooms are laid out in a perfect square or rectangle. Find a way to divide the room you are measuring into squares or rectangles. If you still end up with areas that are irregular, measure from the longest point in each direction.
2. Most types of flooring (carpet, laminate, hard wood) are sold by the square foot, so you’ll want to take your measurements in feet, too.
3. Measure from baseboard to baseboard or, if the room does not have baseboard, from wall to wall.
4. You may want to label your measurements as length or width to make it easier for you when you purchase your materials.
5. Multiply your length and width measurements for each square or rectangle to get the square footage for the area. Keep a list or a grid of your square footage measurements for each area. When you are done measuring, you’ll simply add these together to determine the total square footage you’ll need.
6. You’ll need to add a little to the exact measurements to account for waste. One way to accomplish this is to simply add a little to your measurements or round up. For example, if the width of a room measures 12’ 8”, just round it up to 13’. The other way is to add a set percentage to your grand totals. Typically, professional installers will add about 5%. Do-it-yourselfers are probably safest adding about 10%. If you do end up with extra, you can always keep it around for future repairs to your flooring.
7. If you are measuring for carpeting, use the exact measurements (no extra for waste) when buying your padding. Padding is normally sold in 100 square foot rolls. If a room measures 150 square feet, for example, you’ll have to buy two rolls of padding.
8. Try to measure when your home is quiet and free from distractions to help avoid mistakes. You also may want to follow the old carpenter’s adage and measure twice to prevent unwelcome surprises when you get your flooring home and begin installing it.
9. Remember to measure closets and include those areas in your calculations.
10. For areas like kitchens or laundry rooms that would have large appliances, remember to move those appliances and measure those areas as well.
11. Dishwashers can present special problems when installing new flooring. Should you move them out and put new flooring where they go or just install flooring up to them? Depending on the thickness of the flooring, you could perhaps get away with flooring up to the dishwasher. If the flooring isn’t too thick, you could still lift the dishwasher up to move it out for repairs. The safest bet, though, is to move it out and install new flooring. Have a professional come in to help you with this if you don’t feel you can safely do this yourself.
12. If you are measuring for hardwood or laminate flooring, remember to include transition pieces in your materials list. You’ll need one transition piece for each doorway, stairway, etc.
With just a little time following these simple steps, you’ll be well on your way to successfully installing your new flooring.