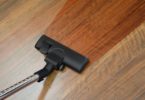
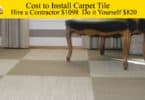
Wood floors are stylish and classic. They are timeless, popular, and very practical. Spilled grape soda can be wiped up completely. If a plant is knocked over and dirt goes everywhere, it can be swept up easily and quickly. It will also increase your home’s value over wood or laminate. If you currently have carpet and would love to switch out to wood floors, you don’t have to pay a small fortune to have the work done for you; you can lay your own wood flooring.
Contents
Tools Needed:
Wood floor nailer and nails
Shims
Rubber mallet and wood floor pry bar
Felt paper
Table saw
Let the Floor Adjust
Stack your flooring in the room it will be installed in and allow it to sit for a few days. This will allow your flooring to adjust to the humidity level of your home, preventing problems down the road.
Prepare the Flooring
Remove the old carpet. Inspect the floor to be sure it’s in good condition. These instructions are assuming you have a wood subfloor. Hardwood can be installed over concrete by creating a wood grid that can be nailed into. Check the floor for level, and fill in any minor dips or holes. Feel along the floor and hammer down any stray nails or staples from previous flooring installations.
Mark the Floor Joists
If you can determine where the floor joists are, mark them on the wall using a pencil. This will allow you to later mark those joists on the floor, nailing into the joists for additional strength.
Understand Expansion and Contraction
Wood expands and contracts. To prevent your floor from buckling, you must leave a ½” gap between all walls and the edges of your flooring.
Felt Paper
This protects the wood from any moisture, as well as minimizes squeaks. Use 15# felt paper, and lay it in strips on the floor. Overlap the strips by about 3#, and use a staple gun to secure it to the floor. As you lay the paper, run your hands over it and double check for those stray carpet nails or old staples.
Snapping Chalk Lines
Move in from the starting wall by one half inch and snap a chalk line parallel to that wall. Use this line when laying the first row of wood to be sure the row is perfectly straight. Do not count on your wall to be straight! If this leaves a slightly larger gap in some areas, that’s okay. It will be covered by your baseboard. You can also use the chalk line to mark off the floor joists on the felt. Nailing into joists where possible will give you a great deal of strength in your flooring.
The First Row
This is the most important row. Choose straight, long boards for it. The boards will be placed with the groove facing the wall and will be secured by nailing down into the top of the board, just inside the back edge of the board. Pre-drill the spots where you will nail to prevent splitting. This row will be under pressure during installation, so take the time to nail into the joists. Place shims behind the installed row to prevent any shifting as you begin installing your floor.
Securing one Board to Another
When it’s time to tap one board into another, use both the mallet and a piece of scrap wood. Never strike your installed wood with the mallet, always use the scrap! This way, damaged edges from the mallet will be on the scrap, not your finished floor.
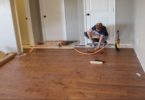
The first Few Rows
You are probably anxious to use your nifty floor nailer. But it won’t work on the first few rows because the walls are in the way. For the first few rows, securely tap your boards into place, predrill holes through the tongue at a 45 degree angle, and gently hand nail the boards into place. Use 1 ½” finishing nails and secure the nails with a nail set.
Installing Pieces by Walls
When you come up against the side walls, you won’t have room to maneuver the mallet, much less the mallet and a scrap piece of wood. Use a pry bar designed for wood floors. This pry bar will have one short lip for slipping between the wall and wood, and a large lip at the opposite end that you will tap with the mallet. A felt pad on the bottom of the bar prevents scratching, and as you tap it the wood piece will be pulled into place.
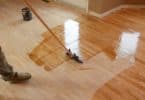
Laying the Strips
Teamwork is ideal when laying wood floors. One person can sit on the floor, inspecting pieces and setting them up while the other person can work the nailer. As you are laying the floor, keep a few things in mind. Do not line up end joints in adjacent rows. The end of one board should be at least six inches away from the ends of the boards in adjacent rows. You should also be sure that end joints do not line up with joints in the subfloor. Remember that you are creating a staggered floor with a random pattern, not a checkerboard. Inspect every piece prior to installation for worm holes, nicks or other damage. This will help ensure that you are left with a quality floor that you will enjoy for many years.
<>