Level floors are taken for granted. Floors that are not level are annoying and can cause major challenges if you are trying to replace your floor. Luckily, leveling the floor does not require rebuilding the house, and is actually a relatively simple job.
Contents
Check the Basement Beams
It’s possible that your floor is uneven due to settling of the house. If your home has an I-beam, you can actually correct the uneven joists from the basement. This is not necessarily a project for the do-it-yourselfer; but the cost of hiring a contractor to undertake this can be well worth it. This is especially true in multi-story homes where both levels are uneven. Correcting the problem in the basement can leave you with level floors on both upper levels. Be forewarned, however, that a consequence of this action can be cracked plaster and drywall upstairs. The option definitely bears investigating, even though you may well decide it’s not the right one for you.
Leveling floors with a Small Drop
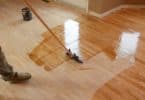
Sometimes the floor is only out of level by a small amount. Or the problem is not so much that the floor is out of level, as much as that it has small dips in it. This problem can be resolved using a bucket of floor leveler.
Clean the floor thoroughly, apply the floor level, and smooth it over the surface. This method is ideal for applications over concrete subfloors where linoleum or vinyl will be applied. It is easy to do, relatively quick and inexpensive.
Dealing with Large Drops
Sometimes the floor has a large drop, in which case liquid floor leveler is not recommended. Or, you are leveling the floor to install hardwood. While there is a little more work involved to deal with this situation, it is not overly difficult provided you have the proper tools.
Tools required include a level, measuring tape, 2”x10” boards, construction adhesive, long straight edge, table saw, screws and plywood that is tongue and groove.
Measure the Drop
Lay a level on the downhill portion of your floor, beginning at one wall. One end should be at the lowest point, and the other going straight uphill. Raise the low end of the level until it shows plumb. Measure the distance from the bottom of the level to the floor to find what the dip is.
What if the level isn’t long enough to cover the full drop? Lay a flat board on the floor that is long enough. Place the level in the center of the board. Lift the board until the level shows plumb and then measure from the bottom of the board to the floor.
Check the drop across the floor, roughly every 16”. You will be installing strips across the floor, and taking the time to check each one can help you ensure that the new subfloor you are installing is truly level.
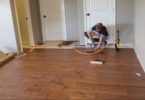
Leveling strips can be cut from 2”x10” strips of wood. One end should be marked for the amount of your drop, and the other end will be marked at zero. Use your straight edge to draw your cutting line, and then use the table saw to create a tapered triangle. You will cut enough of these strips to place one roughly every 16” on the floor. Glue them into place, and then screw them into the existing subfloor to provide a stable surface for your new, even subfloor. Tongue and groove plywood will provide you with a strong, stable subfloor. The new subfloor should also be glued and screwed.
Whether you have your house lifted, or use the techniques listed above to level your floor, you are now ready to install your new flooring. One additional note: floors go out of level for a reason. If at all possible, determine the reason for the cause and be sure that it is corrected. Check the grading around your home to be sure that you don’t have water traveling under the house and causing more problems. This can help prevent you from having to deal with unlevel floors down the road.
<>