• Measure the area of floor space that you would like to cover with the vinyl floor tile (See Figure 1)
• Remember that you should remove appliances or measure under/behind them so that you can install the flooring in the space that they reside on.


Relocate all appliances that sit on the floor surface area (Not Cabinets)
• You will next need to measure the floor surface area that you wish to install the vinyl floor on.
• It is easier and more accurate if you break the floor space down to several areas (Like Boxes) then add all of the area up (See Below)
• As seen in the picture above the two rooms (Kitchen/Laundry) are broken into 6 boxes each with its own measurements
• Each area has two measurements (Length/Width) using the sample below you can then calculate each area for a subtotal of flooring required:
Area 1 = 5’ x 8’2” = 41.6111 SF
Area 2 = 6’2” x 3’9” = 22.5 SF
Area 3 = 6’7 ½” x 3’9” = 23.75 SF
Area 4 = 4’ x 6’7 ½” = 25.0417 SF
Area 5 = 3’9” x 1’6 ½” = 5.3958 SF
Area 6 = 3’ x 2’7 ½” = 7.875 SF
Total estimated area in square feet = 126.1736 Square feet* Note you will need to add additional footage to cover waste and cuts – A good rule of thumb is to add 10% waste which equals 12.61 sf then total the two numbers and get the number of actual square foot needed: 138.7836 feet you will need to buy 140 square feet of tile (If you are going to glue the tile you will also need to get enough glue to cover the same area in square feet. (You can also buy peal and stick vinyl tile that does not require glue which is quite a bit easier to install but will not last as long as commercial vinyl floor tile.
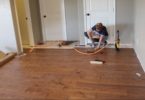
• Now that you have the materials you will need, You are ready to start laying the tile.
• Find the longest straight wall in either of the rooms, This will be your starting point (I have found the right one for you on the drawing below:
• Now you are ready to layout the starting tile and begin laying the floor tile by lining up the second tile with the first tile and so on.
• The 1st tile above is set aligned with the wall and 12” from the line even with the kitchen wall. This will ensure that the tile in the kitchen will line up with the tiles in the laundry room
• Make sure that your tiles are straight and connect tightly to the tile prior and have no gaps between them.
• Now that the laundry room is complete you will continue laying the floor tile into the kitchen as shown below:
You will notice that the pink area is left for the last since these tiles will need to be cut to fit along the walls and door ways – Leave these areas until the very last
• When getting ready to “Cut in” start with the area that has the largest space uncovered and then work towards the spaces with the smallest tile area. This will allow you to use “Cut pieces” to fill smaller pieces. BUT KEEP IN MIND that any tile you get ready to use must have straight factory edges on any edge that will “BUTT” another tile to prevent crooked seams and lines
• Continue filling in all of the voids
Now that you have completed the flooring installation, Wait about 8 hours before installing or moving the appliances, And be sure to use the cardboard boxes that the tiles came in to move the appliances across the floor so that you will not scratch or damage the new floor tile
Caulk around any cove base areas you desire and install thresholds at any door where the floor pattern or type changes (Carpet to tile etc)
<>