Adding a tile backsplash to your kitchen adds value and beauty to your kitchen, And is a very easy project which can be done over a weekend, and is not very expensive to do.
- 1st Measure the area that you want to install the backsplash, be sure to include the area behind the stove.
- 2nd pick up a few samples at a local hardware store of the materials and patterns you are interested in. (Most stores will allow you to borrow samples or purchase them and give you a refund if you decide that you don’t like them.)
- 3rd Set aside at least 2 days that you will have several hours each day to work on this project.
You will need the following materials:
- Tile
- Adhesive (Tile adhesive or liquid nails)
- Tile Spacers
- Grout (You will need to select a color)
- Sealer (Clear)
- Tile install kit (Usually comes with sponge, bucket, trowel, glue spreader)
- Tile saw or cutter

- Never apply more adhesive that you will be able to install tile to before the glue dries, you may want to pre-cut small tiles or around plug outlets prior to applying glue
- Always line up your first set of tiles ¼” inside the cabinet line as shown below:
This will allow room for grout at end of tiles so that the edge will not be seen.
- Apply adhesive or liquid nails to the wall in area that you will be able to cover
- You can use the small tile spacers to hold the tile ¼” above the existing countertop
- And then install them between each tile to ensure that the gaps are the same size
- See below for a sample
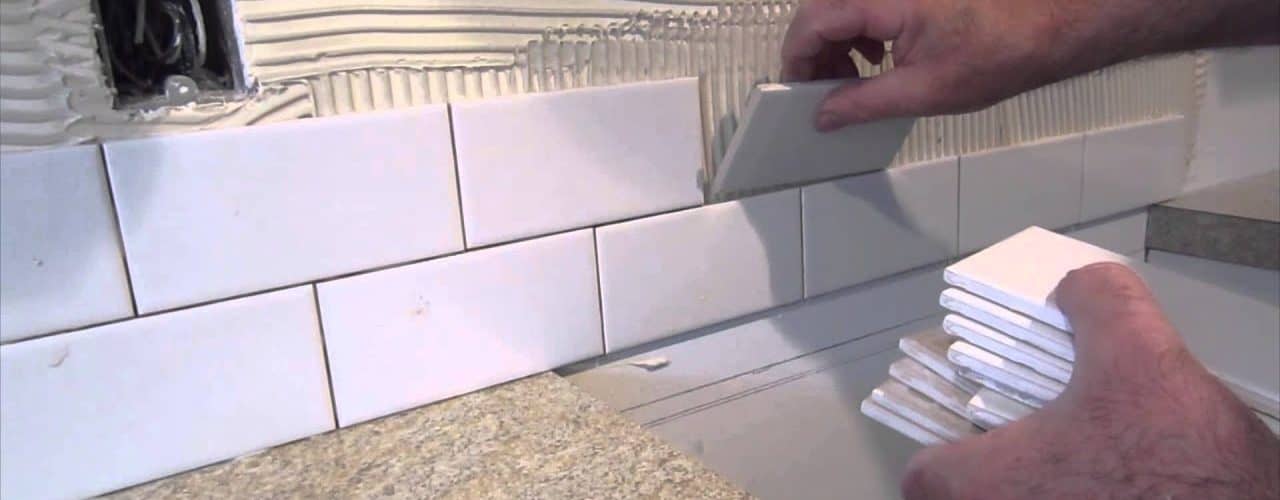
Now that you have the first couple of tile in place, press them firmly and evenly against the adhesive
- Continue to install the tile with the ¼” spacer installed between each tile and work your way across and up the area to be covered. Leave all tile that needs to be cut to a smaller size until last.
- The tile spacers will only stay in place until the glue sets (The next day)
- Then remove the tile spacers and discard them
- You are now ready to mix the grout (Pre-Colored) Read the mixing and application directions on the package
- Install the grout using the flexible trowel pressing the grout into every gap with pressure
- After covering all grout gaps wipe of excess grout with damp cloth or sponge
- Do not attempt to clean the haze off of the tile until it has set for 24 hours
- Then use grout haze remover or a coarse sponge to remove the grout and clean the tile
- This step may require multiple cleanings as the tile grout dries completely
- You are now ready to seal your tile grout to prevent discoloration and staining
- Wait 24 hours between sealer coats or applications so that it will dry completely
<>