For any readers who pride themselves on their simple skills at carpentry, and who have some wood working tools, constructing your own butcher block table proves to be an enjoyable past time.There are a variety of choices for the construction and design of the Butcher Block Table. In this article, we go through the step by step directions for effectively making a Butcher Block Table of which you and your family can all be proud.
Contents
Materials and Items Necessary for the Project:
– Basic skills in carpentry
– Wood
– Olive Oil or Mineral Oil
– Water Resistant, FDA Approved Wood Glue
– Sand Paper
– A Table Saw
– Clamps
Planning Your Butcher Block Table
This is only a moderately difficult project, and will not prove hard for any person with some simple carpentry skills. First you need to plan out the final butcher block table product. Decide on whether it will have fixed legs or wheels. What will the final height of such a table be, and how large will you make it? Do you plan to employ an older existing table frame and simply affix a new butcher block as a top? It is certainly a more daring project to build the entire table from scratch. You could build a new base using a kit for table bases. If you elect this option, remember that the proper thickness ought to be minimally one and a half inches.
Picking Out Your Butcher Block Table Wood
Select the kind of wood which you will utilize for the table, if you have elected to construct the block yourself. You will require a non-porous and durable type of wood. Hard maple proves to be the most often utilized variety in building butcher blocks. Ash, walnut, and beech have similarly been employed. More porous types, such as oak, ought to be avoided. Think about where you will get this wood from, and if you might cut it personally. You might opt to buy a pre-constructed butcher block to affix on to a base which you prefer. After the wood has been picked out, buy a sufficient quantity with which to construct your table.
Laying Out the Butcher Block Table
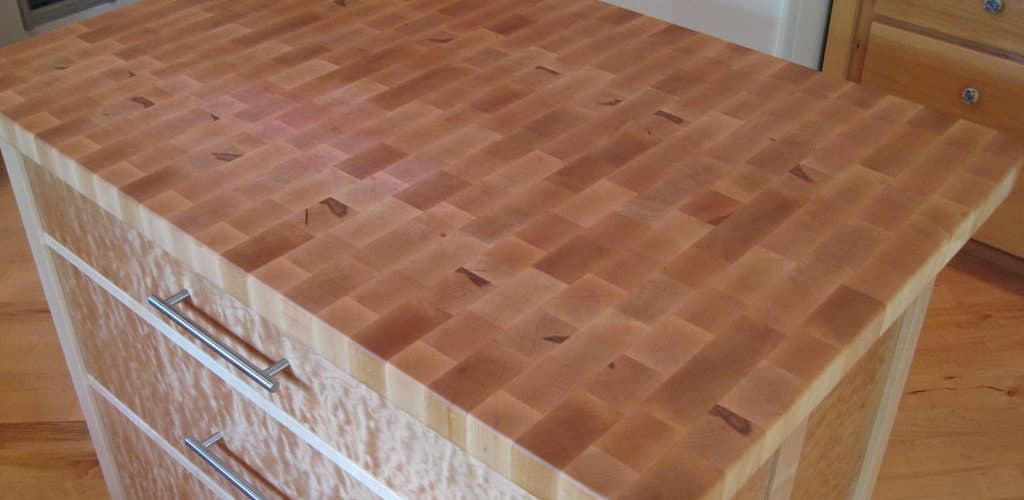
Contemplate and select the way that you will lay out the various wood pieces. The typical butcher block pattern uses the end, or end grain, of the wood. Another method is in utilizing side grain, which is also known as the side of a board. This proves to be a simpler method for building a butcher block. It also reduces the odds of having a joint split, since there are considerably fewer joints which are glued together.
Cutting and Gluing the Wood Pieces Together
Now, cut down the wood to your chosen table size. It is better to leave such pieces a little longer. You will cut them down more in a later step. Pick the sides of the boards which you will glue together, and lightly and gently sand them down. If you own a planer, it is a good idea to plane the wood, too. In this way, you achieve an exactly flat joint.
Now you are ready to glue the various pieces together. First, combine your pieces into three or alternatively four smaller blocks and permit them to dry. In such a way, you will see how much easier it is to simply glue together these smaller blocks into an entire butcher block. Place the pieces together to ensure that they are as flush as they possibly can be. Only work with water resistant wood glue which is FDA approved. An example of this is Titebond II Premium Glue for Wood. Spread around the glue on the board’s face. You might utilize clamps to ensure a tighter fit.
Sanding and Oiling The Butcher Block
Once the glue has fully dried, you will want to chip away any residue that remains. Taking the table saw, cut down the ends to achieve an even edge. Sand down the bottom and top of the block itself. On the top layer, you should employ higher grit in order to attain a smooth surface for the block. If you own a router, then you might create a decorative edge for the butcher block at this point.
Now, utilize a food safe oil, which is non-toxic, to oil down the butcher block. We recommend olive oil or mineral oil. Allow the oil time to properly soak inside of the wood. After this has dried, lightly and gently sand it down again. Now oil it a second time. Permit it to sit undisturbed over night, then make sure that you wipe away any extra oil.
Attaching the Block to a Table Base
Now, attach the block to a base. There are several different ways that you could go about this. You might opt to purchase a leg base kit and put it together, or you could simply purchase a rolling cart type of base. These are to be found at merchant retailers online, or at a hardware store. You might also utilize the base off of an older table. Finally, you could construct your own base. Whichever route you go, be sure that the base is sturdy enough to be employed as a butcher block. The height of this is similarly important.
<>