
Wallpaper is coming back into fashion as a home decorating trend in a big way. Whether you favor bold, bright patterns or subdued neutral traditional prints, wallpapering is a great way to add an aesthetic element to home decor. And with the latest types of wallpaper, installation is quicker, easier, and cleaner than ever before. Interested in hanging wallpaper in a room? Here’s how to do it.
Contents
1) Prep the Walls
The wall surface should be clean and free of dirt or debris. If there’s old wallpaper, remove it before hanging the new paper. Just making sure the wall surface is clean and smooth will help the wallpaper adhere to the wall, and hang smoothly.
2) Measure the Walls and the Wallpaper
Chances are the walls have already been measured, but if the measurements aren’t readily available, jot down the size of the walls which will be covered. Compare this to the length and width of the wallpaper rolls. Figure out how many lengths of wallpaper will be needed to finish the job (ie, if the wallpaper is 24 inches wide and the wall is 10 feet wide and 8 feet tall, 5 pieces of 24” x 5’ paper will be needed.)
3) Cut the Paper
Cutting the paper before you begin eliminates the guesswork out of papering and ensures a smoother process overall. By laying out each piece before you begin, there won’t be any last minute searching for wallpaper or confusion about what goes where. Remember to match patterns – larger patterns tend to be easier to match up than small ones, so lay pieces side by side on the floor to ensure you’re measuring the paper along the pattern edge, ensuring a seamless fit. It’s best to pick a “starting point” on the wall at this time, too, so you know exactly where the pattern will begin and end. Many people prefer to make this at the ceiling.
4) Prep the Paper
This will largely depend on what kind of wallpaper you’ve purchased, but most modern wallpaper is made of vinyl and has a pre-pasted back. This makes it less susceptible to tearing, and easier to handle. Pre-pasted paper can typically be soaked in water to activate the “paste” . Use a common paint roller container for this, or another long, shallow flat pan to soak a length of paper at a time. The manufacturer should specify the time needed to soak to activate the adhesive, but you’ll be able to tell as the paper begins to unroll in the water. Based on the time needed to soak, you might want to pre-soak several pieces in multiple containers or only do one piece at a time.
Note: If the paper you’ve chosen does not have water activated adhesive, you’ll need to roll on wallpaper paste using a paint roller and wallpaper adhesive. Take care not to crease or tear the paper as the adhesive is applied.
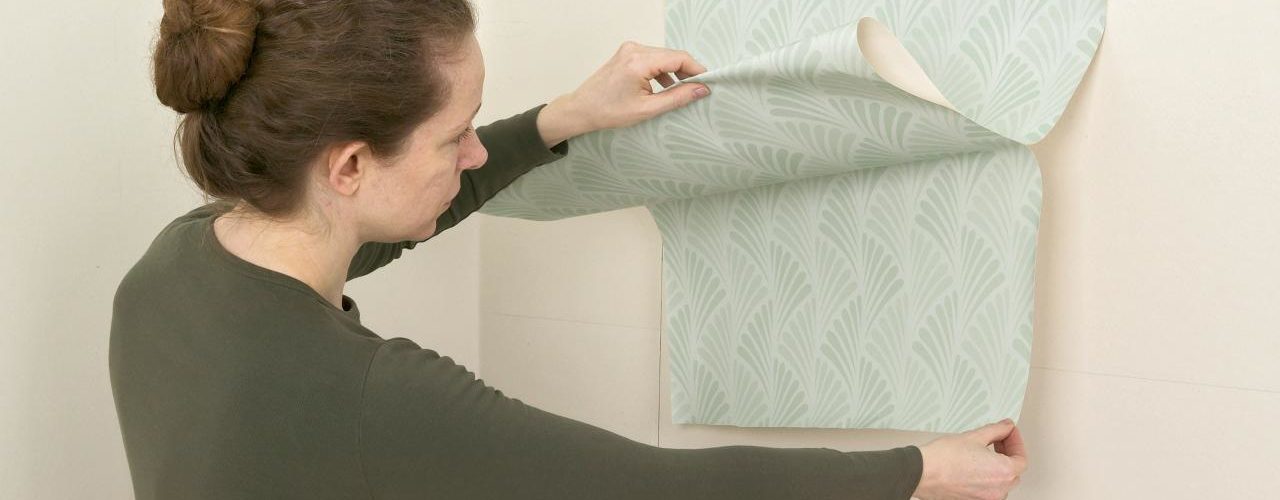
5) Hang the First Piece
Based on the pencil mark you created in step 3), line the first piece of paper up to the “starting point”. Make sure the line is even and straight. Begin with the upper right hand corner, and smooth the paper carefully downward, ensuring the piece is straight and lies smooth against the wall as you work your way down. Eliminate any air bubbles with your hand or a damp sponge.
6) Hang the Rest of the Wall
Working off of the first piece of wallpaper pasted to the wall, take the remaining pre-cut pieces and line up the patterns. Going one piece at a time, carefully work from the starting piece outward to the other walls, eventually coming full circle to the starting point when all the wallpaper has been hung.
7) Smooth The Wallpaper & Trim
Using a damp sponge, firmly press on the paper to eliminate any air bubbles or creases before the paste completely dries. Once the paper is hung how you’d like, use a razor blade to trim off excess around the ceiling, baseboard, or outlets.
8) Let Dry
The easiest part of the process! Once the paper has been hung, the patterns match, bubbles are eliminated and edges are trimmed, it’s time to step back and admire your work.
Suggested Reading: This Old House

