Though time-consuming and laborious, it is possible for the advanced do-it-yourselfer to re-shingle a roof.
What you will need:
- Enough shingles to cover the area of your roof
- 30-Pound felt paper
- Staple hammer
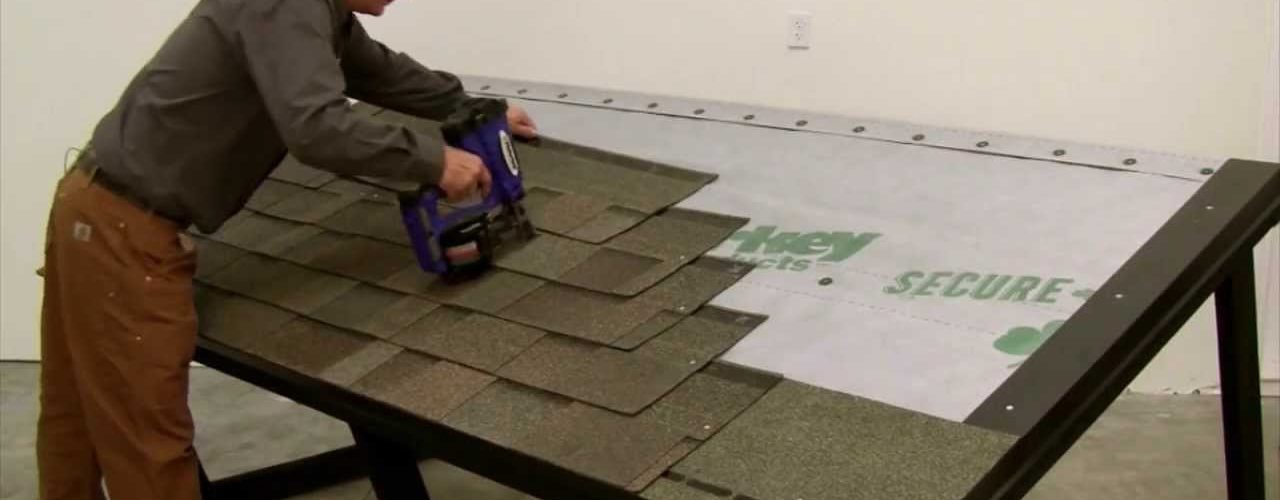
- Nail gun powered by an air compressor
- Chalk line
- Box cutter
- Pitchfork
- Scaffolding
Getting Started
The best way to remove old shingles is with a common garden pitchfork. Drive the pitchfork under the shingles and loosen them with a prying motion. Continue until all of the old shingles are removed. If there is any sort of underlayment, this can also be loosened using the pitchfork or by cutting it into smaller sections with the box cutter and pulling it up by hand.
Once all of the old material is removed, check the roof for any loose boards. These should be re-secured with nails before reapplying the new roofing materials.
Step One
Before any shingles can be applied, felt paper must be fastened to the roof. Starting at the bottom of the roof, run a horizontal course of paper from one side to the other, stapling the paper every 6 to 8 inches. The next course up should overlap the first course by a few inches. This way, if any of the shingles should come loose water will still shed down the roof and not saturate the wood underneath.
Apply a galvanized drip edge at the bottom of the roof, over the felt paper, fastening with nails.
Step Two
Snap a chalk line down the middle of the roof, running from top to bottom. For the first course of shingles, you will cut off all of the tabs. Line up the notch in the top of the first shingle to be laid with the chalk line and secure it with four nails. Continue nailing the tab-less shingles across to both ends of the roof.
The next course of shingles will be nailed directly over the first course. Once these two courses of shingles have been secured, snap horizontal chalk lines every 5 inches all the way to the top of the roof. These lines will ensure that each of course of shingles is applied in a straight line.
You will also need to snap vertical chalk lines every six inches out from the original middle chalk line. Continue to nail courses of shingles, overlapping each course and using the vertical chalk lines to stagger the tabs so that they do not line up in straight columns. This will ensure that water does not leak onto the wood below.
Step Three
Once the roof is covered and the edges have been trimmed of any excess, it is time to apply the ridge cap. Using the box cutter cut the three-tab shingles down to 12-inch squares. Starting at one end of the ridge of the roof, gently fold this square over the ridge and nail it down with two nails. The next square should over lap the first by half, just as the courses of shingles on the roof did. Continue to nail these down until you reach the other side of the roof.