For any reader who is presently looking for a different and unique flooring choice for his or her new or existing home, one novel choice is cork flooring. Cork flooring turns out to be a beautiful, durable, and even environmentally friendly option for floors. Although you may not be aware of this, it is generally less expensive than is equally durable bamboo. Typically, cork flooring compares price wise to the usual forms of hardwood flooring. On top of this, it is often just as easy to install as is regular hardwood flooring. And, cork proves to be very resistant to scratches, far more so than do other types of natural options for floors. Cork is also more efficient in absorbing sounds and impact. Better still, cork flooring is very resistant to mildew, mold, and it is a naturally flame resistant form of wood. Finally, cork can be had in a surprising range of styles, colors, and means of installation. It is available as tiles or in planks, and comes in a comparable shape and size as do ceramic tiles. There are even three types of cork installation that you can obtain— interlocking, glue down flooring, or floating. This article explains the step by step directions for installing your own glue down cork flooring.
Materials and Items Which You Will Require for This Project:
– Flooring Adhesive
– A Trowel
– A Tape Measure
– A Circular Saw
– Wax
– Mineral Spirits
– A Pencil
Preparation Work
Before you begin installing the modern miracle of flooring cork, you will have to perform some preparation work first. To begin, you must take out the baseboards in the room in question in order to properly get it ready for the cork flooring replacement. Then you will measure where you will actually place every strip of the cork flooring, starting at the room’s center and going to every edge of the room. Although you will be installing the flooring from one wall down to the other one, you still need to measure from the middle. This measuring technique makes sure that the boards at both ends of the room are uniform in size.
Putting Down the Adhesive
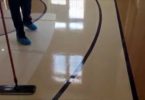
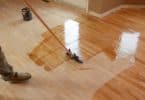
To put down the adhesive on the sub-floor, you will need to employ a trowel. In order to make ridges in the adhesive, you should utilize the trowel’s notched edge. Push the cork flooring itself down firmly into this adhesive. You will want to take frequent breaks to ensure that the flooring is going down levelly throughout the room.
Laying the Cork Floor
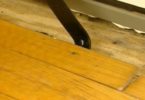
Starting in the corner of the room’s innermost wall, lay down your cork flooring. You should put down the first board completely. With the second row, put in the cork flooring via sliding the tongue of the flooring inside the groove. Snap the two boards together well. To achieve greater durability and a more pleasing appearance of the flooring, stagger these cuts.
Keep working in this manner, putting in every layer of the cork floor until the entire sub-floor is completely covered. You should leave a little gap surrounding the room’s perimeter. This will allow for the floor itself to expand and contract, depending on the atmospheric conditions and temperatures outside. Investigate the manufacturer’s instructions to learn how big a gap this needs to be.
Cleaning the Cork Floor
Now you need to clean this cork floor which you have installed. Using mineral spirits, you can safely and effectively clean the cork flooring. Once this has been done, wax the cork to ensure a nice protective layer remains on top of it. In order to give the flooring’s adhesive sufficient time to cure with the cork, you will need to make sure that no one walks on the new floor for a minimum of forty-eight hours. This is necessary so that the cork floor will remain level.