
Installing a roof vent is a simple, do-it-yourself project that should take no longer than a day. Choose a dry day, as shingles are slippery when they are wet, and try to start the project mid-morning as the glue on the shingles will have absorbed some heat from the sun and will be easier to pry off.
Have the following tools on hand prior to starting the project:
- Roof Vent
- Dust Mask
- Hammer
- Nails
- Chalk Line
- Utility Knife
- Drill
- Flat Bar or Pry Bar
- Jig Saw or Reciprocating Saw
- Large Chisel
- Roofing Nails
- Roofing Cement
- Shingles
Contents
Step 1 – Mark the Location of the Vent
Wearing the dust mask, from the inside of the attic, mark the position of the roof vent. The markers should be one half inch larger than the vent opening. Avoid placing the vent across the rafters, as cutting through a rafter will weaken the structure of the building. Place the markings 18 inches from the peak of the roof. Drive a nail up through the roof and the shingles marking the four corners of the vent, including the one half inch allowance.
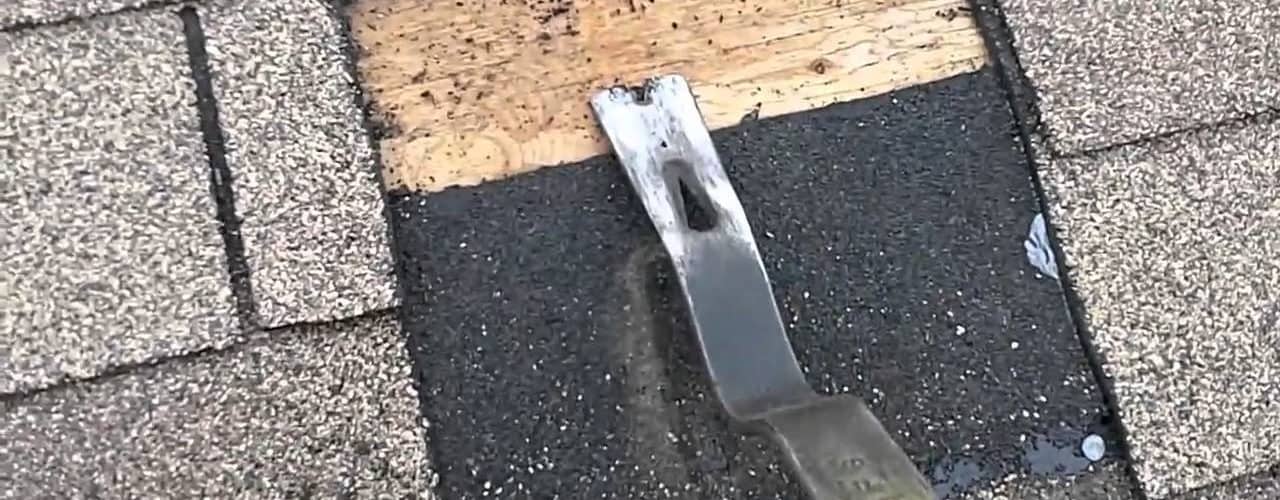
Step 2 – Cut the Shingles
Atop the roof, locate the markers for the roof vent. Using the chalk line, mark straight lines between the nails. Remove the marker nails. Using the utility knife, cut the shingles along the chalk line. Using the flat bar or the pry bar, remove the shingles from the vent opening. Save the shingles for replacement after the roof vent is installed.
Step 3 – Cut the Opening for the Roof Vent
Drill a starter hole prior to cutting the roof. Using the jigsaw or the reciprocating saw, cut through the roof sheathing along the vent opening.
Step 4 – Preparing the Roof for Vent Installation
Using the large chisel, gently pry up the shingles surrounding the vent opening in order to loosen the glue. Remove all nails or other obstacles that will prevent the vent from forming a watertight seal on the roof.
Step 5 – Place the Vent
Slide the edges of the vent underneath the shingles. Apply roofing cement along the edges of the vent, and nail the lower edge of the vent into place with roofing nails. The roofing cement will secure the nails and provide a watertight barrier around the vent. Apply additional roofing cement to the under side of the shingles surrounding the vent opening. Ensure that the shingles adhere to the lip of the vent, and nail the shingles into place. Use new shingles that closely match the current roof to replace any shingles damaged in the process.
Step 6 – Clean Up
Remove any excess shingles, nails, or other debris from the remainder of the workspace. Items left on the rooftop may cause the remaining shingles to warp, and shorten the lifetime of the roof. Thoroughly clean the sawdust and insulation from inside the attic. As with any building project, check the municipal building code to ensure that the vent meets or exceeds current specifications prior to beginning the project. As a precaution, ensure that a spotter or helper is on hand in case of emergency such as falling from or through the roof.
<>

