
Your fireplace has been working without issue for years on end. It has provided warmth and comfort within your living room throughout many cold nights within the winter. However, over the past couple of years, the economy has seen a rise in energy costs which have you questioning the use of a wood burning fireplace. A fireplace insert is a device that inserts directly into your already existing fireplace and allows for you to run a fire based upon outside sources such as natural gas and or propane. This alternate solution has seen a rise in popularity over recent years and below is some step by step instructions that I have found useful regarding installing a fireplace insert within your home.
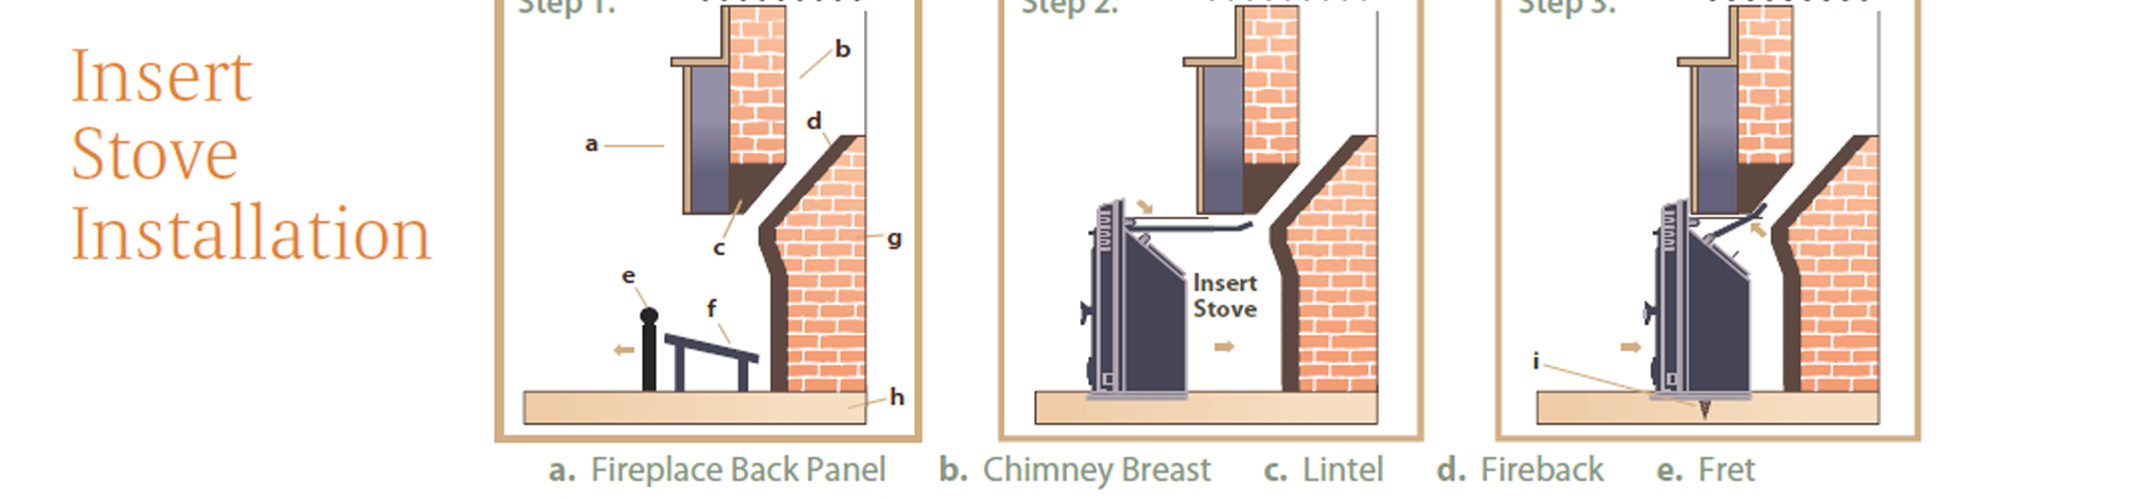
1) Place the fireplace insert on the ground in front of the fireplace. Gently with the help of another person, slide the insert deep into the fireplace’s chamber until it is almost touching the back. The insert needs to be centered as best as possible so that any residue or smoke flows through the chimney to the outside.
2) The next step requires a trip to the top of your chimney via a ladder to the roof. The damper will be taken off of the top of the chimney and you will need to have purchased a flue liner. A flue liner is an element that is inserted in a chimney to provide protection to the stones of the chimney and the home itself. Usually these are recommended by most home inspectors and insurance agents for added safety. The flue liner will be lowered into the chimney shaft until it reaches that top of the insert. The liner will then be mounted on the insert and fastened securely with a set of screws included in the kit.
3) Carefully outline the insert within the chimney so you can verify where it will be attached. At this point, you will be connecting the upper extender panel to the insert with a drill and a few screws included in the package. Once the upper extender panel is securely in place, the two side panels can then be entered and fastened on the insert in similar fashion to the top panel.
4) All seams, joint and openings within the insert need to be secured with an epoxy or caulking compound. This will prevent any leaks in the insert that may cause problems later on in the life of the product.
5) Within the fireplace insert kit that you have purchased, there should be an ample supply of insulation included. This insulation is used for the back of the insert to make sure that the insert is not affected by the outside elements coming through from the opening in the chimney chamber. More is better when insulating for it will play an incremental part in the amount of heat that is generated by the fireplace insert.
6) Once complete, verify via your instruction booklet that came with the product or via the company’s website, on how to properly configure the insert for heat as well as how to work any thermostat controls that may be included.

