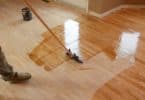
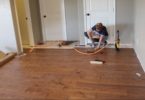
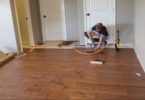
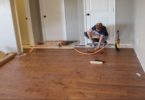
Wood laminate flooring is manufactured in several styles that range from strip flooring, to sectional flooring and uniform squares. Strip flooring is typically 4” or 6” wide, individual pieces with a tongue and groove at the edges and at each end. Sectional flooring will have two or three strips that are pre-assembled with tongue and groove along the sides and at the each end of these pieces. Uniform, laminate wood flooring is manufactured in pieces that range from 12” to 24” squares, with tongue and groove as well.
All laminate wood flooring is available in unfinished or pre-finished styles, and the better flooring will have a minimum of 1/8” thick, top laminate that allows for refinishing. Flooring is ordered by the square foot, and any estimate should include 5% over for waste. Installing any laminate wood flooring begins with preparing the sub floor and base of the walls prior to installation.
With regard to the base of the walls, there are two methods of installation. The first includes removing the baseboards, installing the flooring, and resetting new base atop the floor. The alternate method is to lay the flooring to within ¼” of the baseboard and trim the room with ¾” base shoe. This method is most often used in rental units, since it requires less time to complete the installation.
In addition to the wall prep, the sub floor must be detailed to remove any staples, tack strips or residual adhesive from the previous flooring or carpets. The entire sub floor area must be thoroughly checked for consistency and leveled using a water base floor leveler. Once the sub floor has been leveled and detail sanded, it should be cleaned free of any dust and debris using a damp mop or shop vacuum.
Layout of the floor area is the key to an attractive installation. A thin cut along one wall can detract from the finished appearance, and for this reason, time should be spent on the layout. Begin the layout by snapping perpendicular chalk lines that intersect at the mid point of the room. Where a room is 10’ x 14’, there will be a chalk line at 5’ one way, and 7’ the opposite way.
Next, place flooring pieces along a section of the longest line, and fit these together, side by side until they are close enough to one wall for a measurement. If the flooring is consistent in width, simple calculations can be made to establish a start line that will result in equal width pieces along either of the long walls.
Once this determination has been made, snap the appropriate starting line at the center of the room, and erase the original line to avoid confusion. If water based adhesive is being used to attach the flooring, start at the far end of the room, so that the installation will be in a direction toward a doorway. If the flooring is installed as a floating floor, place the Styrofoam underlay and re-snap the starting lines. The installation should begin at the center line of the room, and work toward the walls.
Fitting the tongue and groove pieces along a wall is best done with two lengths of flooring, side by side in an “A” configuration, and then pushing them into place. Be sure to leave a ¼” gap between the face of the wall and the edge of the flooring to account for any moisture expansion. Continue the installation in sections that are easily reached, since this will allow easy adjustments for a consistent flooring surface. Trim the ends of the flooring to ¼” from the wall to complete the main portion of the installation. Any offsets or closets can be completed by continuing the layout of the main floor into these areas.
Transition pieces in similar material as the laminate flooring should be used at doorways where the flooring meets carpet or ceramic tile. The transition pieces can be shimmed using proper shim strips for a consistent walking surface from one room to the other.


