
It may turn out to be a surprise for most people reading, but the truth is that installing siding on a house is actually pretty simple. Although there are numerous different kinds of siding, we find aluminum and vinyl to be the most common forms. These are basically installed in the same fashion. In this article, we go through step by step directions to help the reader with his or her project to install siding on the house.
Contents
Tools Needed:
– Circular Saw
– Level
– Pencil
– Chalk Line
– Snips
– Hammer
Measuring and Multiplying Prep Work
First you will have to ascertain the quantity of siding that your house will require. Begin with measuring your home’s exterior. Start with the walls; measure their length. Next, move on to the height of every wall concerned. Armed with these numbers, you are ready to determine your square footage of siding necessary. Figuring up square footage only needs you to multiply the total height by the total length of the walls. If you have gables, you will need to measure them as well. Such gables are the triangles which end in a peak and define out your roof’s line. Correctly figuring up the area of any gables is done by first measuring the bottom of the middle of the triangle on up to the peak of your house’s roof’s distance. Simply multiply these numbers together, then divide the answer in half. This number must be tallied with your other square footage information to get a total siding requirement. Now you know how much siding that you need to buy complete the project.
Other supplies will have to be purchased as well. Buy the correct quantity of trim. Besides the siding needed, you additionally have to buy starter strips and J-channels. The actual length of your walls will be the corresponding amount of starter strip length that you require. The correct quantity of J-channel that you require is ascertained in measuring all of your doors, windows, and additional breakups in the length of your walls’ perimeters. As a good rule of thumb, between thirty-five and forty-five pounds of nails ought to be enough to entirely side an average sized house.
Finally, figure up the numbers of outside and inside corners that your wall has. Generally, corner posts are bought in eight foot to twelve foot long sections. Should your home prove to be higher than these, you will require specifically made items. Your home improvement store lumber expert will aid you in getting them. Purchase a single corner post for all of your outside and inside corners.
Putting In The Trim and Starter Strips
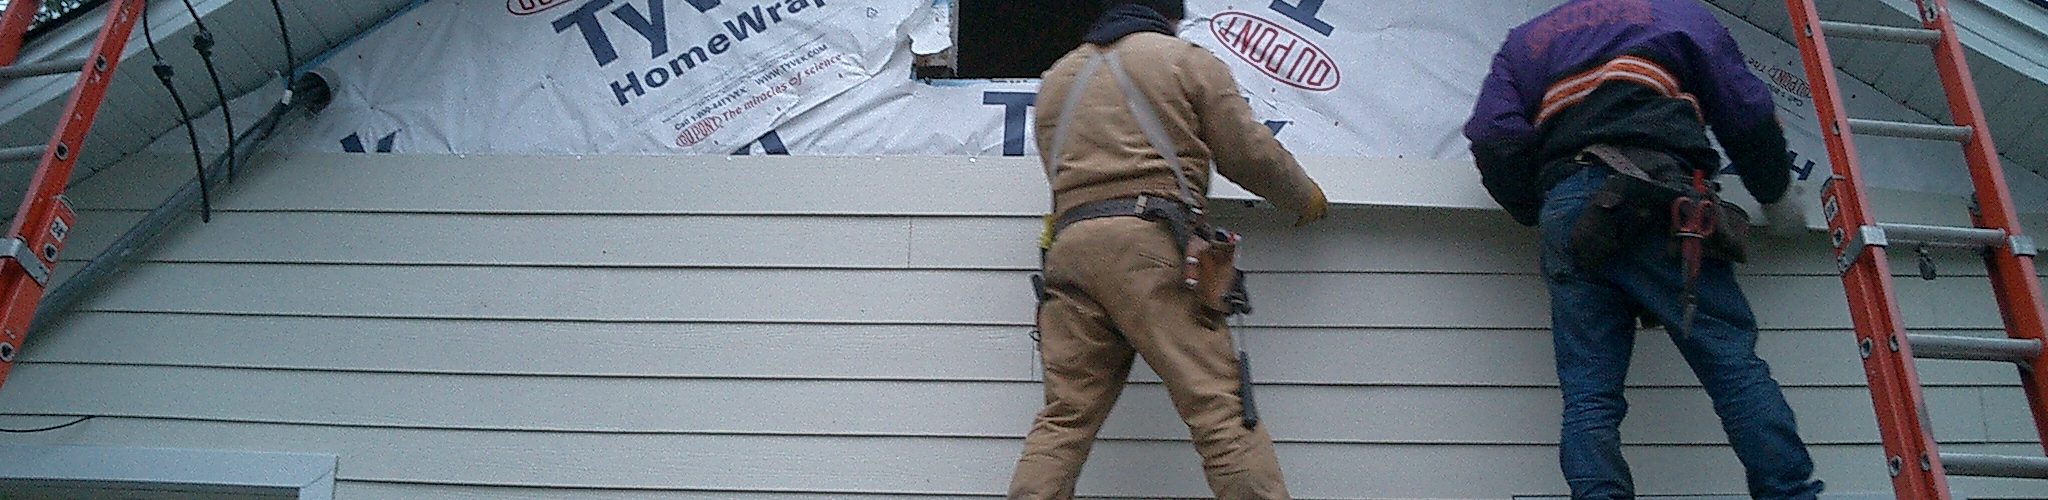
To put up aluminum J-channels surrounding a window, you will have to first affix posts and J-channels. These will be put encircling doors and windows. Such trim pieces will hold in place the ends of your panels, as well as covering up rough edges around utility boxes, pipes, vents, and cantilevers. Following the installation of the J-channel, affix corner posts to every outside and inside corner. Be certain to correctly center every nail in the corresponding holes. The corner posts must be secured along your walls.
Starter strips go around the entire perimeter of your home, where the wall’s bottoms are. Mark these strips. Measure from the bottom of the walls to the bottom of the eaves. Remember to snap a chalk line at the place where every starter strip will be put. Next, nail every starter strip to the walls, after each chalk line is properly marked. We suggest that you put in a nail each ten to twelve feet. Fortunately, these starter strips come with already drilled nail holes, making your job easier. These strips are supposed to hang somewhere between one and three feet from the foundation’s top.
Putting in Your Siding Rows
To affix the first siding row, remember that this row will be located at the wall’s bottom and affix to the starter strip. The siding ends should abut to corners or trim. Remember to begin at the row’s center and work along towards the end. Each sixteen inches, you should hammer in a nail. It is important that you do not tightly nail in the siding panels, since they must have the ability to expand and contract with changes in the weather.
Closely mind the placement of vertical seams. Should a section of siding not be sufficiently long to cover the whole length of the wall, then simply affix a second section in order to complete the row. Top parts should overlap bottom panels. In such a way, you design a seam. Seams ought to not overlap any more than three inches.
Affix additional rows of siding to cover up the whole wall, utilizing your first siding row as a guideline. Should you reach a place where complete siding rows will not totally cover up the surface, and you can not manage a seam, then you must become creative and cut down any remaining pieces of siding in order to cover over strange shaped gaps. Trim the ends of the siding that face any obstructions by about a quarter inch, where any siding rows get near a door or window. In such a way, you will at least make certain that the siding is lying down flat. The trim will cover up any gaps, which no one will be able to see when you are done with the project.

