
One of the growing trends in home renovation that continues to gain popularity is that of floating hardwood floors. This doesn’t come as much of a surprise, as it allow homeowners the comfort, warmth and beauty of hardwood floors without the prohibitive costs of building one from scratch or messing around with any major structural changes. The best part is that installing floating wood floors is fairly simple, so there’s no need to hire a contractor to do the work for you. All you’ll require is a bit of time and patience to finish entire rooms in under a day.
Contents
The Tools For The Job
First, purchase your materials. If you’ve done any research into the subject, you’ve no doubt heard of Swedish laminate flooring manufacturer Pergo. They make a good quality product but they’re by no means the only supplier out there. Prices may vary by location and the general market but they’re all fairly comparable. As far as tools are concerned, your needs will be fairly minimal. A band saw will be needed later to trim the final pieces to your exact requirements, but most of the required tools are included with the flooring kit you’ll purchase from your local home supply store.
Getting Started
Most homeowners will be installing the flooring over concrete, though it can be done on plywood or any other material. If there’s any carpeting present, strip that off and allow the floor to dry off, using a dehumidifier to remove any excess moisture. The first thing to do is trim the door moldings. You’ll need at least a quarter inch clearance, but you’ll have to wait until the final stage to adjust that so they’re flush with your new flooring. Many find that removing the baseboard molding and then reinstalling afterward is a easier, but it’s really up to you. Now you’re ready to put down the insulation.
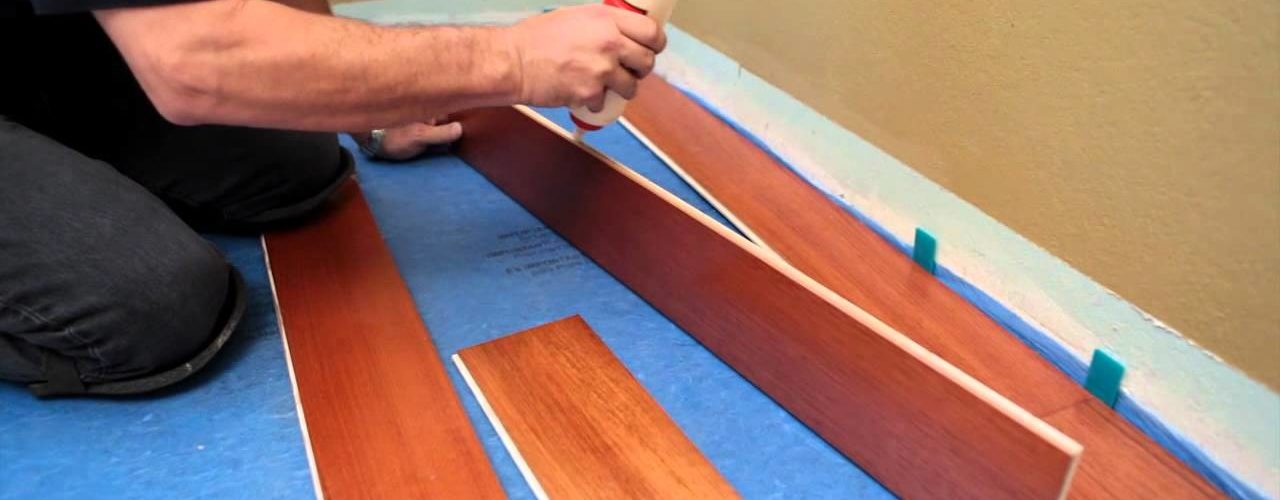
Prepping The Workspace
Simply lay down the provided sound-dampening insulation layer according to the directions provided with the laminate flooring kit. It always helps to have a visual guide when performing any home renovation, so here’s a quick rundown from Popular Mechanics with photos included just to give you an idea of how things should look as you progress. Once you have your neoprene padding laid out, you can proceed to begin installing the actual hardwood laminate flooring.
Quick And Easy Flooring Installation
The actual installation of the flooring material is incredibly easy. Your flooring panels will lock together snugly via the tongue and groove joints along the edges. Start on one side, making sure the flooring is flush with the wall. Then work your way out, locking in panels as you go, tapping them in with a hammer. Just use a block of wood and a cloth and don’t pound it in too hard, to avoid damaging the finish. If at any point you feel lost, head on over to the DIY Network and watch their video for tips and tricks to make sure you’re doing it right.
Tying Up Loose Ends
When you’ve almost completed the full space you’re working on, the only tough part is measuring out the final edge pieces which won’t require full panels. Here’s where you’ll have to use a power saw to pare down the flooring pieces to fit in the remaining gaps. There’ll be a small space between the flooring and the wall, but you’ll need that for thermal expansion and contraction so that the floor doesn’t buckle. Then it’s just a matter of putting back the baseboard molding you removed at the outset and you’re done. And it’s really as simple as that. Of course, we can’t cover every detail of laminate hardwood flooring installation in a space as short as this, so make sure to refer to the handy links we’ve provided in the text and in the reference section to make sure you know exactly what you’re doing before you get started.
Here are 3 youtube videos that you can watch to learn more about how to install floating hardwood floors.
References:
This Old House: Installing a Floating Floor
eHow: Installing Floating Wood Floor
Hardwood Installer: Installing Floating Floors
<>

