
There are many variables when installing a ceiling light. Depending on your mechanical ability and where you want the light can determine the degree of difficulty involved. For example, if there is already a light installed in the room, it is as simple as turning off the power, removing the old light, and installing the new one. The trick comes when there is no light in place and you want to add lighting to a room. Assuming there is a light already in the room, this will walk you through the process of installing a new fixture.
Tools needed: step ladder, rubber handle pliers, screwdriver, wire strippers.
If there is a light that you want to replace, follow these simple steps:
1. Turn off power at the panel. Most electrical panels are labeled by room, location, or appliance. Once you have located the correct breaker, turn it off. Also, be sure to turn off the light switch for extra protection.
2. Remove the old light. Most lights will have a glass globe that is held in by screws. While lightly pushing up on the globe with one hand, unscrew the screws that hold it in place. Once these have been loosened enough, take the globe down and set it aside.
3. Remove the light bulbs.
4. There will be two screws inside the globe which are facing up into the ceiling. A few turns should be enough to loosen the light enough to remove. Take the entire fixture and rotate it slightly, usually counter clockwise, to allow the fixture to drop from the two screws that are holding it in place.
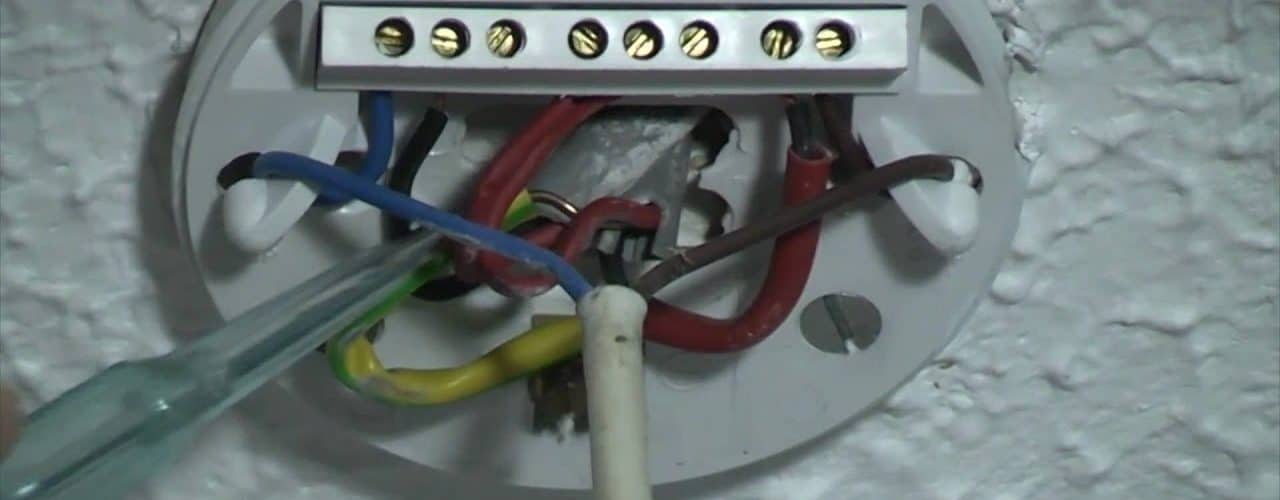
5. Unhook the wiring. Remember that a colored wire is the positive (risk of electrical shock), the white is the negative (no shock unless light is on), and the bare or green wire is the ground. To unhook the wires, turn the wire nuts/caps counter-clockwise. Once the wire nut is off, the wires should be twisted together. With a pair of rubber-handled pliers, untwist the wires so they separate.
The old light is now removed and you are ready to install the new fixture. Remember, if the light you are installing is much heavier than the old light, a new box will be necessary to hold the weight of the fixture. If the goal is to install a ceiling light/fan or a hanging chandelier, a qualified electrician is recommended. Assuming it is the same type of light, follow these steps to install the new fixture:
1. Remove the new light from the box and ensure all parts are there. There should be a slotted bracket with a hole in the center, a threaded rod, two screws, the fixture with three wires protruding (black, white, and green), and a globe.
2. Mount the slotted bracket to the two screws in the electrical box. This can be done by removing the screws and re-attaching them. If no bracket is present, move on to attaching the electrical wires.
3. Take the new fixture and hook up the wires. Twist each wire, color to color, with pliers so that each wire twists uniformly to the other. Try and avoid twisting one wire around the other, this can create a loose connection causing an electrical arc. If the wire is stranded, meaning there are multiple little wires within the wire casing, twist those together before attaching it to the wires in the electrical box.
3. Once all wires are attached, it’s time to mount the fixture. Attach the fixture to the slotted bracket with the screws provided. If no bracket is present, attach the fixture to the two screws in the electrical box then rotate clockwise to secure. Take the threaded rod and screw it into the hole in the center of the bracket. This will be used to attach the new globe. Most new fixtures are built this way.
4. Screw in your light bulbs. Attach the globe to the rod or the screws on the outside of the fixture, depending on the light.
You have now installed a new fixture in the ceiling. Turn the breaker back on and test the light to ensure it is working correctly.

