
Building a wooden walkway is actually fairly simple, but there are several important things to know before beginning. Before beginning the project it is crucial to check with local city zoning regulations to be certain the walkway plan will comply. Following are some helpful tips and directions for building a durable and lovely wooden walkway that will last for years:
Contents
• Mark The Area
Using stones, rope or paint, prepare the area of ground where the walkway will be located. For those who are simply removing a concrete walkway, this may not be necessary if the walkway is already marked by a dirt path. If a person does not want grass growing under the walkway, it may be necessary to remove grass in the path and place a layer of thick plastic to prevent vegetation growth under the walkway.
• Measure The Area
Carefully measure the entire length of the path, including the curves if there are any. After measuring the length of the path, measure the width. If the width tapers wider or narrower at one point, it is important to measure those areas accordingly as well. Most people will choose not to leave spaces between the planks on the walkway, but if spaces are to be left, it is important to consider how wide they will be and keep that figure in mind when shopping.
• What To Know Before Shopping
One of the most important things to keep in mind about wood is the risk of termites. These pests will quickly destroy a wooden walkway if the proper materials are not used. Some woods are treated with a termite prevention pre-treatment, but these treatments are not always effective. After several years they may wear off, allowing the termites to feast on the wood easily. Also it is important to remember that while it may be easy to add more treatment to the top of the walkway, it will be impossible to add it below the planks without completely tearing up the entire walkway. The best types of wood to buy are cedar, redwood and juniper. Termites do not like these kinds of wood, so they will be safe to use.
• Buying Materials
After everything is properly measured, the shopping process begins. It is best to purchase the wooden planks from a trusted home improvement store or lumber yard. When purchasing planks it is important to use precise mathematical skills to figure out exactly how many planks will be needed. Purchasing a few extra planks for future repair or replacement is advised. Purchase the right amount of landscaping timbers; these are the beams that will hold the planks above ground along the length of the path. Ask for assistance when seeking timbers for a curved walkway.
• Coating
For those who are building a walkway in places where there is plenty of rain or snow, it is important to apply 2-3 coats of a weatherproofing substance designed for the type of wood chosen. This will prevent damage to the wood and unnecessary excess moisture entering the wood.
• Lay The Landscaping Timbers
This process is very simple; lay the landscaping timbers along the length of the path as it has been measured. Be sure to space the beams apart in equal length, parallel to one another.
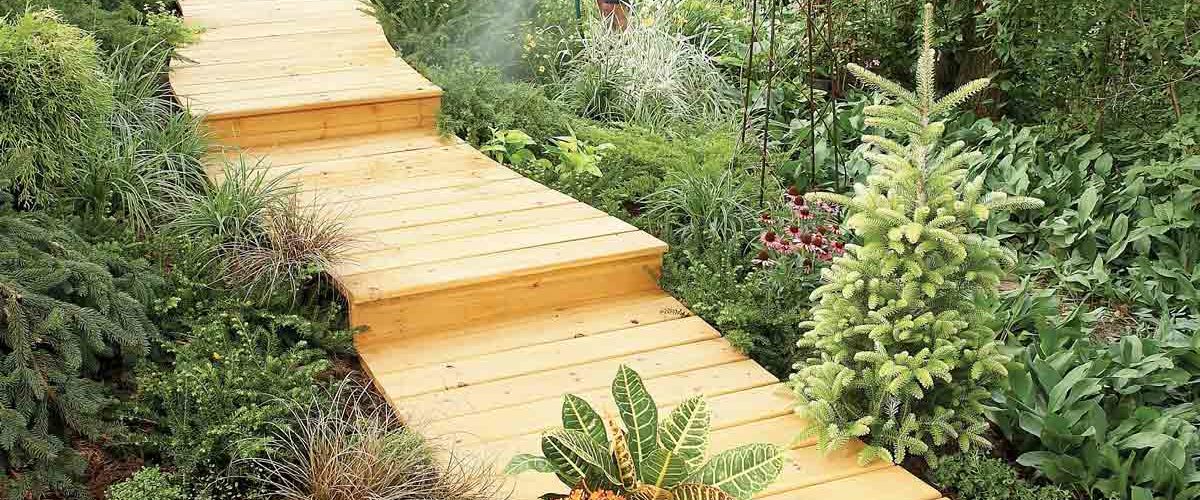
• Lay The Planks
Place the planks across the landscaping timbers so that each end either meets or hangs off the timbers evenly. It is important to be sure the planks are carefully laid straight, as doing so will make the walkway uneven. Using long nails, fasten the planks to the timbers with a hammer or nail gun.

