Cedar siding provides an attractive and durable finish to your home and can enhance the overall architectural design. Cedar is highly resistant to insects and weather as the wood contains natural preservatives. This type of siding is easy to install and so can be carried out by anyone with decent DIY skills. It is also dimensionally stable and so will lie flat and straight against a surface and is less likely to warp or swell than other soft woods.
Cedar siding is available in a variety of different styles and matching trim boards. Try to select cedar siding that has been kiln dried, as this creates a balanced moisture content which means it is less likely the cedar will shrink or expand once installed.
Materials and Tools
You will need some specific tools and materials when installing cedar siding including:
• Chalk Line
• Stable Gun
• Stainless steel siding nails (1-1/2 inches or 1-1/4 inch nails depending on thickness of sidings)
• 16-gauge finish nails
• Hammer
• Quality flexible caulk
• Flashing
• Quality vapor barrier
• Cedar siding and trim
Step 1 – Prepping the Sidings Before installing the cedar siding it is best to lay it out for a few days in warm weather to allow it to adjust to local humidity and temperature. This will also ensure that it has dried out thoroughly in case it has become wet during storage or transportation.
Check through all of the boards to confirm the color and appearance of each piece is acceptable. If the cedar sidings have not already been primed, then you should coat them in a clear wood protector (you can find out more about this process at Extreme How To.
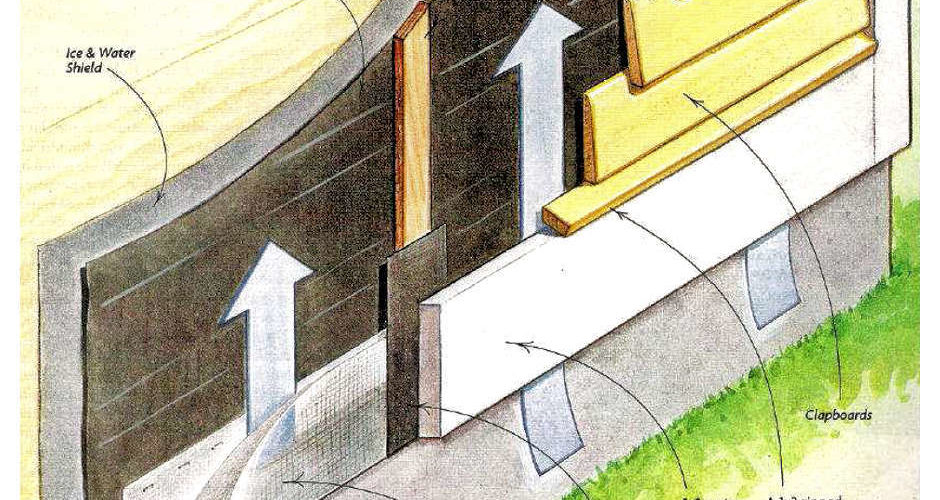
Step 2 – Prepping the walls Wrap the walls in a quality vapor barrier, which will provide additional protection against any moisture that may penetrate through the cedar siding. This can be fixed easily with a staple gun or using plastic washer-headed nails. You can install siding over wood sheeting or wood studs. If installing over masonry then 2×2 wood furring strips must be installed vertically first.
Step 3 – Installing the Sidings Use the chalk line to mark out a straight starting line perfectly level with the building foundations. Starting from the bottom, nail the first siding board into place. Fix the stainless steel nails at the top edge where they will be hidden by the next overlapping board. Work along the wall until you have completed the row, making sure the boards pushed tightly together. Start the next row from the opposite end and ensure that there is an overlap of around 1.5 inches (covering the nails on the underneath board). Repeat this until the wall is finished.
Step 4 – Flashing and Trim Install the flashing on the top of the wall and lower edges of the windows to channel water away from the sidings. Install the trim with the 16-gauge finish nails and apply caulk to any locations where the siding meets the trim.


