
Creating a paved walkway is wonderful addition to any landscape, but does require some planning ahead. First, the material that will be used to pave the walkway should be considered. There are several materials, including paving bricks and stones. It is helpful to draw a picture with dimensions so that the amount of materials that will be needed can be calculated. Add 5% to the total amount to account for bricks or stones that need to be cut for the pattern that is chosen.
Home improvement stores usually have individuals who are willing to help with these. There are also a number of tools that will make this project easier to tackle. Here is a list of the tools and materials needed:
· Safety equipment (work gloves, knee pads, and safety goggles)
· Measuring Tape, wood stakes and mason line to outline the walkway
· Shovel
· Gardening rake
· Line level
· Rubber mallet
· Landscaping fabric
· 2”x 4” board
· Brick cutter if the pattern requires cutting stones or bricks
· Metal or plastic edging if bricks will not be used for edge of walkway
· Course gravel
· Leveling sand
· Paving stones or bricks
· Renting a plate compactor is recommended
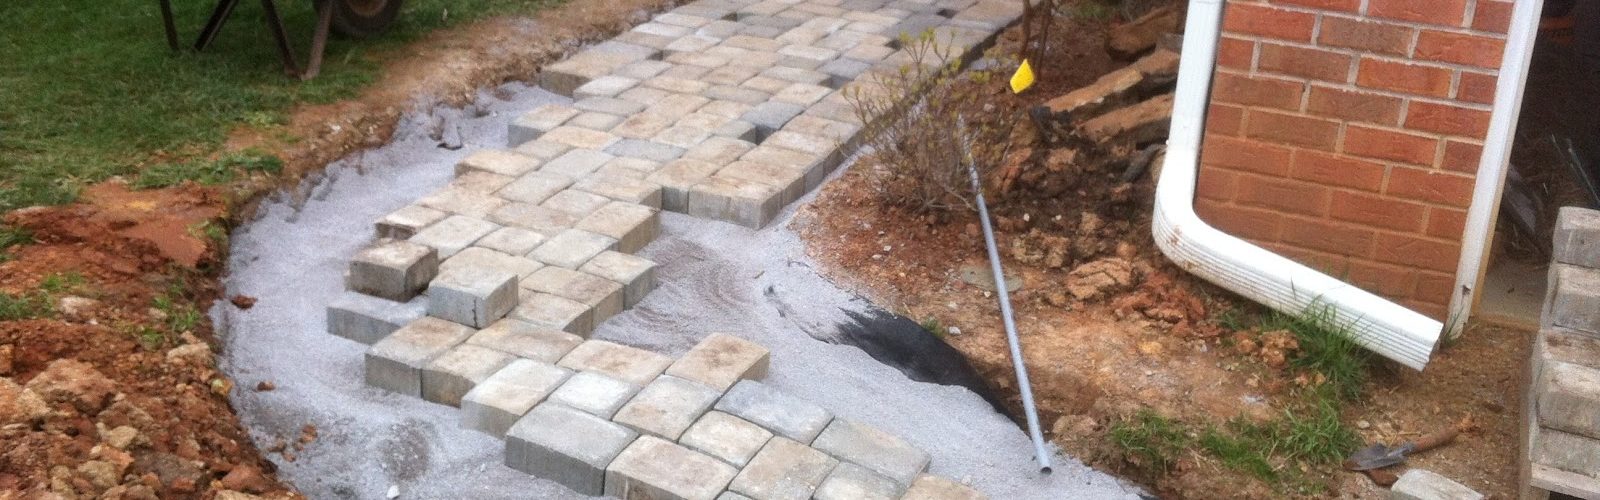
The first step in paving a walkway is to mark off the area of the walkway with the wood stakes and mason line. Be sure to measure the dimensions of the walkway to make sure there are enough of the materials needed to complete the project, and that they match the drawing that was initially made.
After this is done, remove all debris and vegetation. Dig a trench that is 5” deeper than the stones or bricks being used. Level out the area, and use at least ¼”, and no more than ½” grade, for drainage. Lay down the landscaping fabric to prevent growth under or in between pavers. At this point, put down the edging.
If using bricks to edge, use a 1” layer of sand under the edge and make sure that the bricks are at least 2” above ground level. Layer 4” of course gravel on top of fabric spreading it out with the garden rake, then step on the gravel to level as much as possible before tamping down with plate compactor. The next layer should be 1” of the leveling sand, and since the sand will filter down into the gravel be sure to measure to so that there is at least one inch of the sand. Then use the 2” x 4” board to screed, or level, the sand before tamping it down.
Using the line level in each of these steps is useful to maintain the grade. After the sand is leveled out, start the pattern in one corner of the walkway, leaving ¼” space between each brick. If there are bricks or stones that need to be cut, they should be scored on all four sides, then cut. Level the stones by gently tapping the bricks with the rubber mallet, and using the line level on top of the 2” x 4” board. Once all the bricks or stones are in place, spread the leveling sand over them and use a broom to spread the sand. Continue with this until the sand is built up level with the stones and sprinkle with water gently so as not to wash away the sand. If any additional sand is needed after that, work it back into the groove between the bricks again and sweep the walkway clean. Now, you have a wonderful walkway.

