This article will assist you in adding a closet for additional storage space within your house or garage. It is a fairly simple process and rather quick to complete. However if you decide to use drywall it will take 2-3 days to complete due to dry times of seam/joint treatment, floating and texture and painting. If you use a material such as wood paneling the whole project can be completed within 6-8 hours.
Before you start you will need the following tools:
- Screw gun (and #2 Phillips head driver bit)
- Level
- Square
- Fine Tip Marker
- Straight edge (4’ft if possible)
- Hammer
- Safety glasses
- Dust Mask
- Utility knife & blades
- Hand saw, skill saw or cordless saw
NOTE: Anytime you are using motorized tools or equipment read all safety manuals, safety information and USE EXTREME CAUTION at all times. Never allow children to play around work area. DO NOT PROCEED IF YOU ARE NOT COMFORTABLE WITH THE ITEMS SHOWN ABOVE!
You will also need materials of course, How many will depend on the size of the closet you wish to build. But here is a list of the most common things you will need. (This is based on a 2’6” x 6’ closet using existing ceiling and two existing walls.)
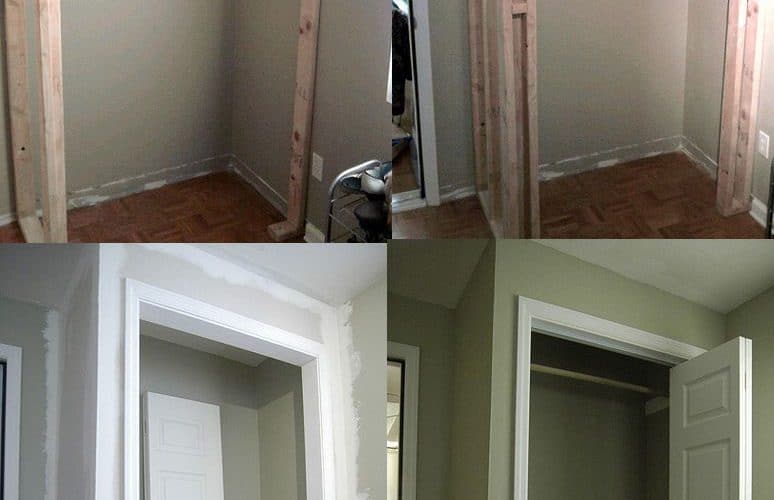
I will insert images of our work as we advance for directions and to assist you better in seeing the project before it is completed.
Okay, The most important part of this project is the framing and connections to the existing structure.
So it is critical that you base the size of the closet to match existing framing that you will connect the new walls too. The good thing about “ADDING” a closet is that it can be removed later with very slight damage to the existing walls (Will only require caulking or minor drywall texture to repair)
1. Locate the existing studs in the corner of the room which you wish to install the new closet space. This can be done with an inexpensive stud finder or by lightly tapping the wall with a hammer and listen for a SOLID sound, This means there is a stud directly behind the drywall in that location. (Test the stud location by driving a small nail in the wall and see if you do hit the stud. Once the stud is located measure 14.5” away and try another nail and see if you hit a stud. You may have to try this a few times to find the center
2. The reason the stud location is important is this is the location that you will “CENTER” your new stud wall to so that it will be secure to hold the wall in place.
3. After locating the studs in BOTH walls in the corner, Mark the studs with a pencil for later reference
4. Now using the MARKS on the wall hold a level to the mark, ensure that it is level and direct it to the floor, Draw a light line beside the marks towards the floor
5. Now at the bottom of the wall next to the floor place another mark, This will be the center line of your BOTTOM PLATE studs. (See sample below)
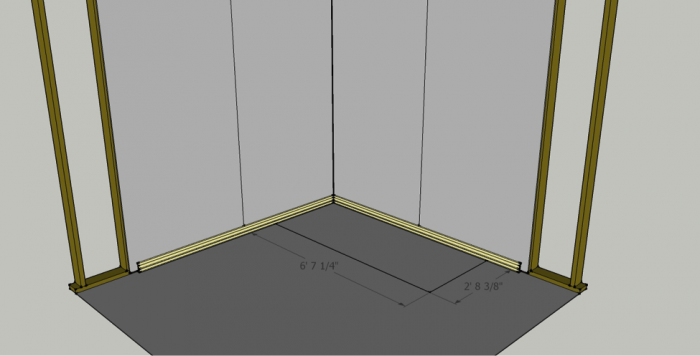
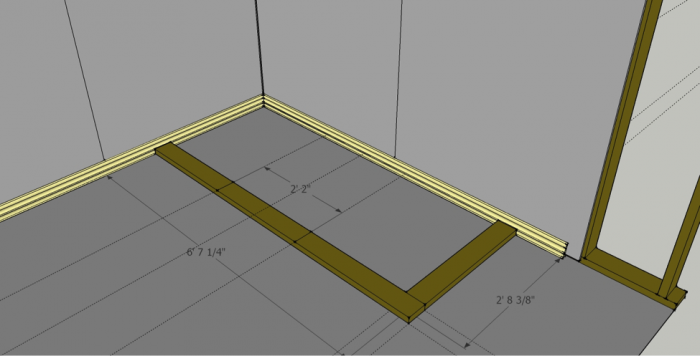
My center lines are 6’ 7-1/4” x 2’ 8-3/8” (Approximate size of closet.
6. These lines match up with the existing studs in the LEFT and RIGHT wall
7. If you have cove base or cove molding (Leave it in place so that the closet can be removed later if desired. You can work around this
NOTICE: See how the marks on the floor match the existing studs in this X-Ray view. This is the best method to ensure that the closet walls will be sturdy
8. Next we will layout the BOTTOM PLATE studs – See below
DO NOT NAIL OR ATTACH THESE PIECES OF WOOD AT THIS POINT
9. Notice my line marks are now in the center of the two boards laying on the floor. This will line up the two new walls with the studs in the existing walls
10. We will now mark the long board to make cuts for the doorway
11. See the picture below (We are going to use a 2’0” door, which will need a rough opening of 2’2” x 6’9” tall
12. Find the center of the long board and place a mark then measure 1’1” on both sides of it placing a mark on both points.
13. Using your square place a line across the stud to give you a straight line to cut the board for the door opening (See below)
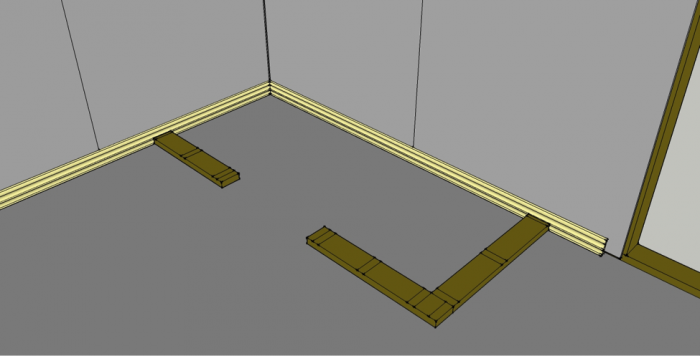
14. Now that the door way is cut you will mark the bottom studs where each upright stud will be installed. Pay special note to the corner board marks above. These need to match the drawing above so that the drywall or paneling will have a stud behind it for attachment in the corners
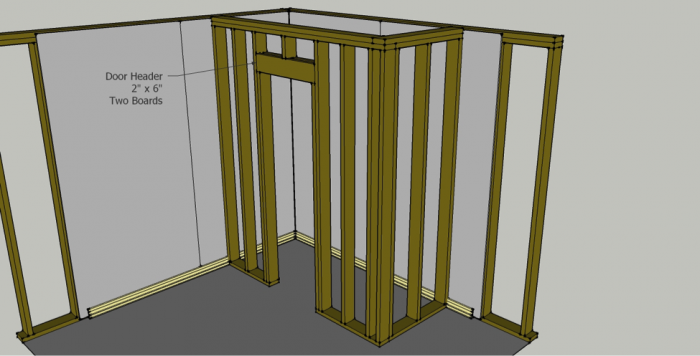
15. You will duplicate the same pattern of the BOTTOM PLATE STUDS for TWO levels on the top plates, The only exception will be you will NOT cut an opening for the door way.
16. You are now ready to attach the TWO layers of top plates (1 at a time) to the ceiling, Make sure that they are directly in line with the bottom plate studs
17. You are now ready to measure the distance between the TOP and BOTTOM stud plates. Take an additional 1/8” – 1/16” off the wall studs to allow you to stand them between the two plates.

18. Notice there are two smaller studs in the door way, these should be 6’ 7 ½” above the floor
19. Screw each stud in place and make sure they are straight, flush and level
20. Next you will install the header boards above the door way,
21. You are now ready to install the door frame, door
22. After the door way is installed install wall covering such as drywall, or paneling
The following images are for more detailed measurements
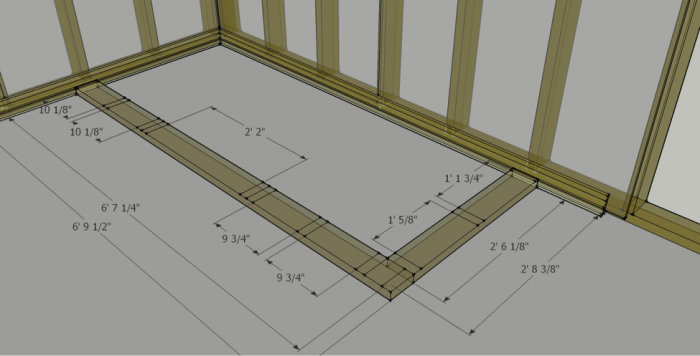
<>
<>
<>
<>
<>