
Remodeling a kitchen can be a tough but rewarding renovation. Often kitchen renovations are among the most expensive home improvements a homeowner can make, but the results are well worthwhile. While, the prices of construction materials may be inexpensive, hiring contractors to carry out the project can often multiply the costs by large amounts. One solution that people are turning to is to do the work by themselves. With the help of the internet and home improvement television shows, people are feeling more empowered than ever to carry out their own construction projects. Installing a tile backsplash is one of the easiest improvements to a kitchen for a novice to undertake.
Contents
Planning
All home improvement projects should begin with a plan that clearly defines the goals and parameters of a project. The most important factor to think about is the budget. The budget will determine everything, from the material that is selected, to the amount of space that is actually covered in tile. After a budget is made, exact measurements need to be taken. In this step, a homeowner needs to decide how far up the wall the tile backsplash will go.
Some people choose to stop the backsplash at the bottom of cabinets, while others choose to take the backsplash up to the ceiling. It’s all a matter of personal preference. Also, it’s necessary to think about where the backsplash will stop horizontally. Will it stop at the edge of the cabinets? Or, will it extend to the edges of the walls? What will happen to walls that do not have cabinets?
By consulting with a designer or contractor, homeowners can decide what look will best suit their tastes. Once a decision has been made about how much of the walls will be covered, precise measurements need to be taken. There are several methods of estimating areas, but one of the easiest is to break up spaces into several large, rectangular segments. For each segment, the length and width can be written down. As soon as the measurements of length and width are taken, an estimate of the area can be determined by multiplying the lengths and widths and then adding them all together to come up with a final number.
Supplies
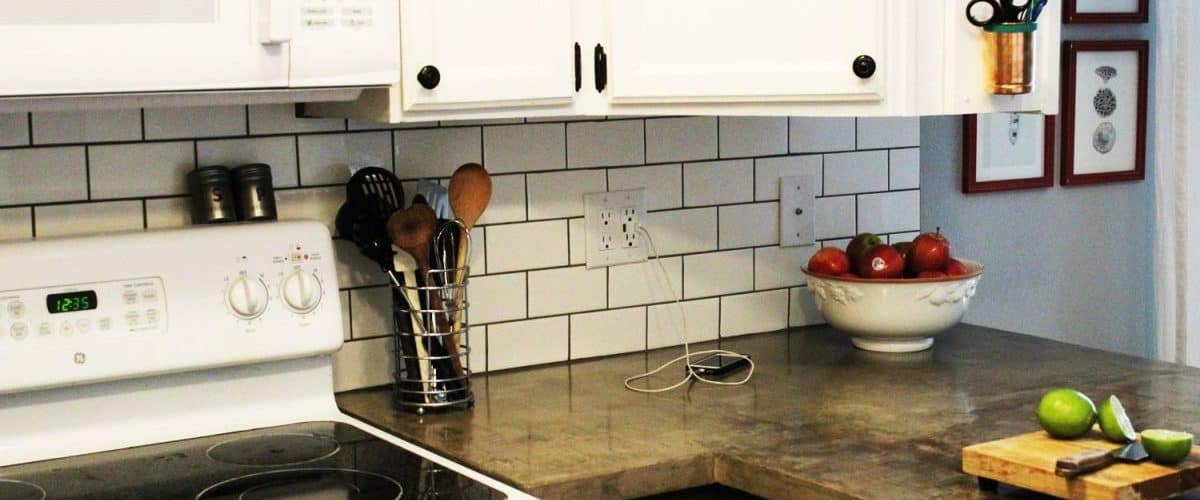
Tile is an inexpensive material that can add a rich feel to a kitchen when installed on a backsplash. Tile comes in all shapes and sizes and in different materials. Most often, tiles are fabricated from glazed ceramic, although solid, glass tiles are becoming increasingly popular. When shopping for tile, one option to consider is shopping online. Shopping online for supplies can save a lot of money, since many online shops provide cheap prices with no sales taxes. Tiles are sold either loose or in sheets held together with mesh. When purchasing tile, homeowners should buy at least 10% -15% more than they estimated their needs to be. This is because waste, estimation errors, and accidents always happen. It is better to have too much tile than to run out and have to find more.
In addition to tiles, the following equipment is needed:
Grout
Level
Trowel
Wet saw (fitted with diamond blade if using glass tiles)
Bucket
Sponge
Gloves
Spacers
Chalk line
Prepping the Walls
The first step in installing a tile backsplash is to prep the walls. Electrical covers should be removed and the walls themselves should be cleaned and dry. If any repairs need to be made to the walls, now is the time to fill holes and sand. At this point, any surfaces that are not going to be covered with tiles can be also painted.
Dry Fitting and Cutting
The old adage in construction saying one should “measure twice and cut once,” holds true in this case as well. Before installing the tile permanently, it is important to do a dry fit of the tiles to see how they fit into place. It is also advisable to make a paper template of the design so that it is possible to see how the design will look on the wall. Cutting tiles can be done on a wet saw. It is important to remember to plan around electrical outlets and any other obstructions such as window frames.
Installation
After the tiles have been cut, the actually installation of the backsplash can take place. When adding adhesive to the wall, it is important to follow manufacturer directions to ensure that the adhesive works. Also, one should not mix too much adhesive at one time. The adhesive can be layered in a thin, 1/4 inch deep thickness with the smooth side of the trowel. After that, the installer needs to hold the trowel at 45 degrees and use the notched side to make ridges in the adhesive. Tiles can then be placed onto the wall, starting in a corner and working outwards. If using individual tiles, spacers need to be placed between tiles to ensure even spacing and straight rows.
Grouting and Sealing
Grouting is the final step in installing a backsplash. Package directions should be followed for mixing grout. After that, grout can be worked into all the spaces using a grouting tool. Excess grout needs to be removed from the surface of the tiles. The grout needs to dry for a period of time specified by manufacturers of the particular grout. After that, a damp sponge can be taken across the surface of the tile to remove any residue.
The final step in installing a backsplash is to apply sealer. Sealers protect the grout and the tile from staining if they have porous surfaces. Sealers come in spray cans or in liquid form that can be applied with brushes or sponges.
Conclusion
Installing a backsplash is a relatively easy process if the right tools and equipment are available. Not only will it make a kitchen attractive, but a backsplash can also increase the resale value of a home. After all, when shopping for a new home, the kitchen is often the most scrutinized room.
<>

