
Pocket doors are most often used in situations where the available clearances don’t allow a hinged door to swing fully open. They can also be used for convenience, such as the door to a powder room, or where a hinged door might limit the space for certain activities in a room. For anyone that is considering installing a pocket door, it is necessary to determine the thickness, or depth of the existing wall where the door will reside, and whether it will be necessary to install a bearing header to span the pocket door opening.
Pocket door frames are manufactured in several thicknesses that will accommodate standard 2” x 4″ and 2” x 6” wall construction, with a typical drywall or plaster finish. Since the thickness of a pocket door frame can differ with any combination of these framed walls and finishes, it is necessary to measure the overall depth of the wall prior to ordering the frame. The best way to do this is to remove the sections of drywall or plaster at both sides of the wall where the door is planned. This will expose the wall framing to the degree that the depth of the wall can be measured. The pocket door can now be ordered at the correct depth to match the thickness of the existing wall framing.
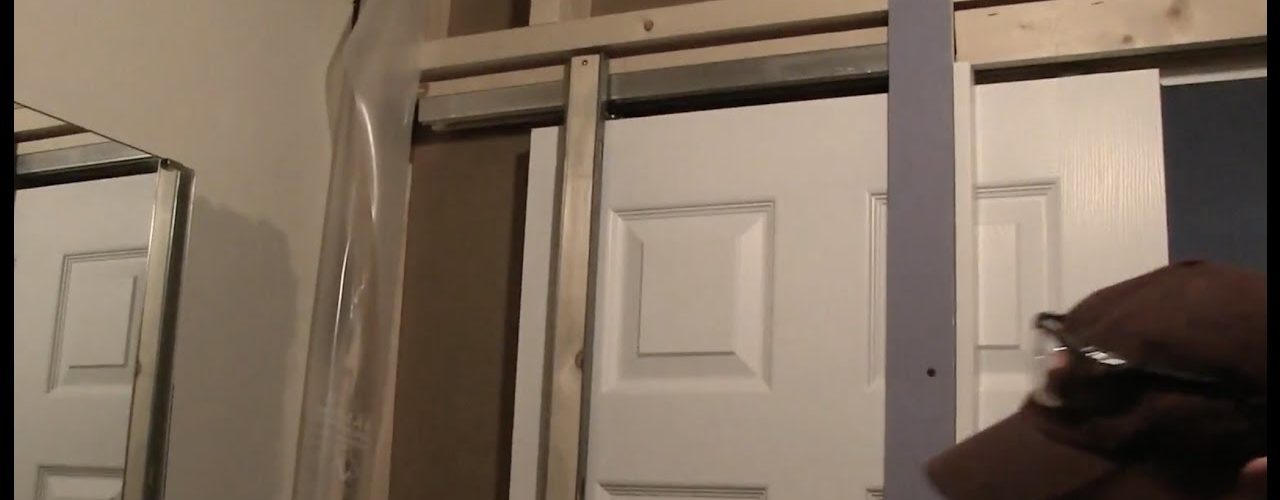
With regard to structural concerns, the rough opening for a pocket door frame will be a little more than twice the width of the actual door opening, and slightly taller than the height of the desired door. Once the drywall or plaster has been removed, if it should be determined this particular wall is non-bearing, a header will not be needed. In the event the wall is bearing, a sufficient header must be installed to span the overall width of the pocket door frame. In either event, it will necessary to remove the vertical framing at the area of the opening, as well as the bottom nailing plate that is attached to the floor. This will provide a clear opening to set the pocket door frame.
The size of the rough opening for the pocket door frame will be the width and height of the actual frame, plus ½” each way. This additional clearance will allow for shimming, in order to plumb and level the frame in the opening. Once the rough opening has been determined, removing the wall framing can be done using an electrical reciprocating saw with a wood cutting blade. Any anchor bolts or hold-down pins that remain can be cut flush with the sub floor using a metal cutting blade.
The pocket door will be shipped with tabs attached to the frame, in order to prevent the door from sliding on its track. These tabs should remain during the installation process, and can be removed once the door has been installed.
To install the frame, begin by plumbing one side of the rough opening with a level, then set the frame tight to this side. Attach the frame temporarily using wood screws that can be removed if any adjustment is necessary. Next, check the frame for level across the top and bottom, and shim the frame if necessary. Once the frame is level, attach the top of the frame to the header using wood screws. Attach the bottom of the frame to the concrete sub floor using a 3/8” diameter expanding anchor bolts. In the event the sub floor is plywood or a metal deck, screws can be used to attach the bottom of the frame.
Finally, check the opposite side of the frame for plumb, and shim it in place. Attach this side using wood screws. Complete the installation using wood screws at a minimum of 12” apart, in order to fully secure the frame in the opening. The shipping tabs can now be removed, and the door frame and surrounding opening can be finished with drywall or plaster.

