
Hardwood floors are a popular addition to any home due to their natural beauty and durability. They are also commonly installed as do-it-yourself projects. By following several straightforward steps, the task can easily be completed.
Preparation
There are several different materials that will be needed during the installation of new wood flooring, which include 15 pounds of asphalt felt, white glue, and wood filler. Many tools will also be required, including the following:
• Utility knife
• Pry bar
• Carpenters Square
• Measuring Tape
• Power Drill
• Staple Gun
• Portable table saw
• Chalk line reel
• Curved claw hammer
• Power circular saw
• Nail set
• Wood floor nailer
Because wood tends to expand and contract with the moisture in the air, it is necessary for it to be stacked within the home where it will be installed, for several days. This is done to allow the wood to adjust to the humidity levels within the home.
Installation
There are several steps required in order to ensure proper installation of hardwood flooring.
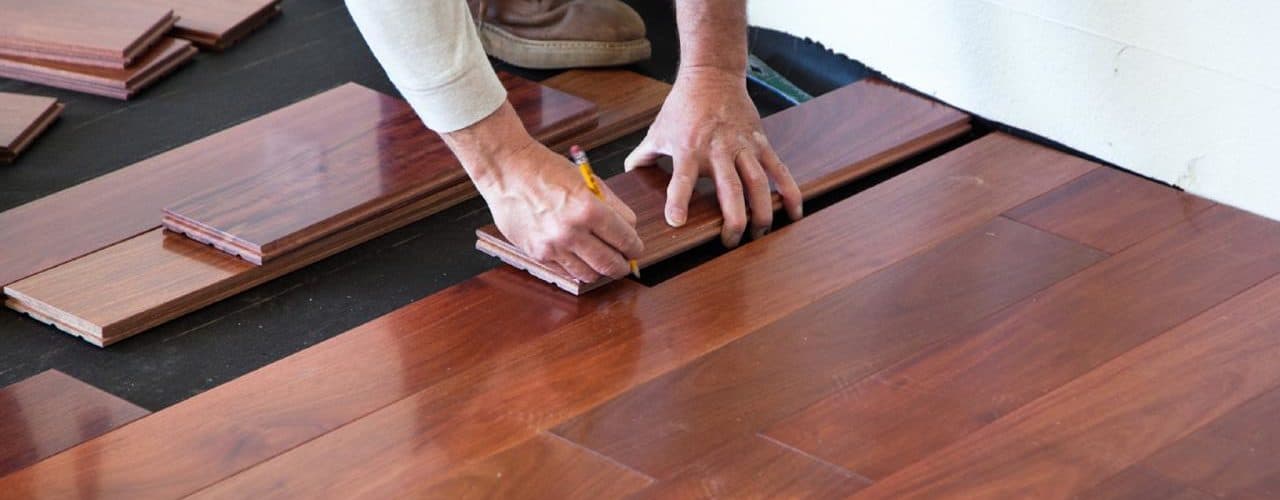
1. Cover the floor with the asphalt felt and tack it to the floor with a staple gun.
2. Determine the width of the room with the measuring tape, and place a chalk line parallel with the starting wall. By using the joist marks along the wall as guides, chalk lines should be placed at locations of the support members.
3. Place another line of chalk about ½ inches from the starting wall in order to allow for expansion. This should be parallel to the center line and will indicate the first row of hardwood flooring. This gap can later be covered with a baseboard molding.
4. Boards should be chosen for the first row, preferably the longest and widest.
5. Next to the wall in the space that will be covered with the baseboard upon completion, pilot holes for 1 ½ inch finish nails should be drilled. Nails should be hammered into the first row through the plywood subflooring to the floor joists. Pilot holes should also be drilled at a 45-60 degree angle through the tongues, at the ends, and every ten inches. 1 ½ inches finishing nails should be used for fastening.
6. A short piece of flooring should be used when moving on to subsequent rows. It is used to tighten the new row against the previous row. The ends in two adjacent rows should not be closer than six inches or line up over a joint.
7. For flooring in a large area, a wood floor nailer should be used once the first three rows have been installed. This will drive two-inch nails through the lounge into each joint and into the subfloor.
8. When on the last row, a pry bar should be used to fit the final boards tightly into their position. Holes should be drilled where the baseboard will cover, and the nail heads should be set underneath the surface by using a hammer and nail set.
9. Reducer strips should be used if the floor causes any change of level to a hall or adjacent room.
Aftercare
Once installed, the new wood floors will need time to settle, so it is generally recommended that they are not walked on for a few days. Once they are being used, it is essential to maintain them, regularly. Sweeping often and placing protective covers on furniture legs will help to reduce floor scratches, damaging the floor’s appearance. Many new wood floor installations do not require the waxes or polishes that were previously used on older floors. Because of this, it is necessary to purchase a floor cleaning product that is meant to be used on the type of floor the person owns. Products designed for older floors can damage the surface of a newer floor.
<>

