
If you can dig dirt, saw wood, mix cement, and hammer nails, you can build a cedar fence. The materials you’ll need are:
• a shovel,
• cedar 4×4 inch posts,
• cedar 2×4 inch rails,
• cedar 1×6 inch planks,
• and one bag of cement mix for every two posts.
The tools and parts you’ll need are:
• a post-hole digger,
• a shovel,
• a chalk line,
• a plumb bob,
• some stainless steel deck screws (to prevent rust stains),
• a nail gun or hammer plus stainless steel nails (to prevent even more rust stains),
• a few stakes,
• and a wheelbarrow or cement mixer.
The first thing you need to do is pick your cedar. Western Red and Northern White are the two top choices, with Western Red being number one. Both take paint, stain, and finishes well. If left untreated, Northern White can get a unique silvery patina after a few years’ exposure to the elements.
Mark the locations for the cedar posts with stakes or paint. Posts should be no farther than six feet apart. Dig a 24-inch deep hole for each post. Before digging, be sure there are no underground cables or pipes beneath the surface. Don’t be sure with the shovel. Be sure by calling the utility and phone companies and asking.
Make the holes a nice, roomy ten to twelve inches on a side. Mix up some cement. Put a post in the hole and fill the hole to within 4 inches with cement. Fill the last four inches of the hole with dirt after the cement is cured. Use a plumb bob or level to make sure the post is plumb. Then brace it with a stake or two to keep it in place until it sets.
Repeat this for all your corner posts. Then set the remaining posts. Use a chalk line to be sure the posts remain even. Posts should be no more than six feet apart to keep the fence strong. After you set all the posts, let the cement cure overnight.
Next, attach the cedar rails to the outside of the posts with deck screws. The top rail should be twelve inches beneath the top of the posts. Use the chalk line to keep the rails straight. They should butt up to each other in the center of each post. You want one at the top and one at the bottom. Keep the lowest rail an inch above the ground, so it won’t rot.
Measure the distance between the two rails. Cut the planks to fit without extending beyond the rails. Nail the cedar planks in place. You can make them flush with each other or gap them by ¾ of an inch for more privacy.
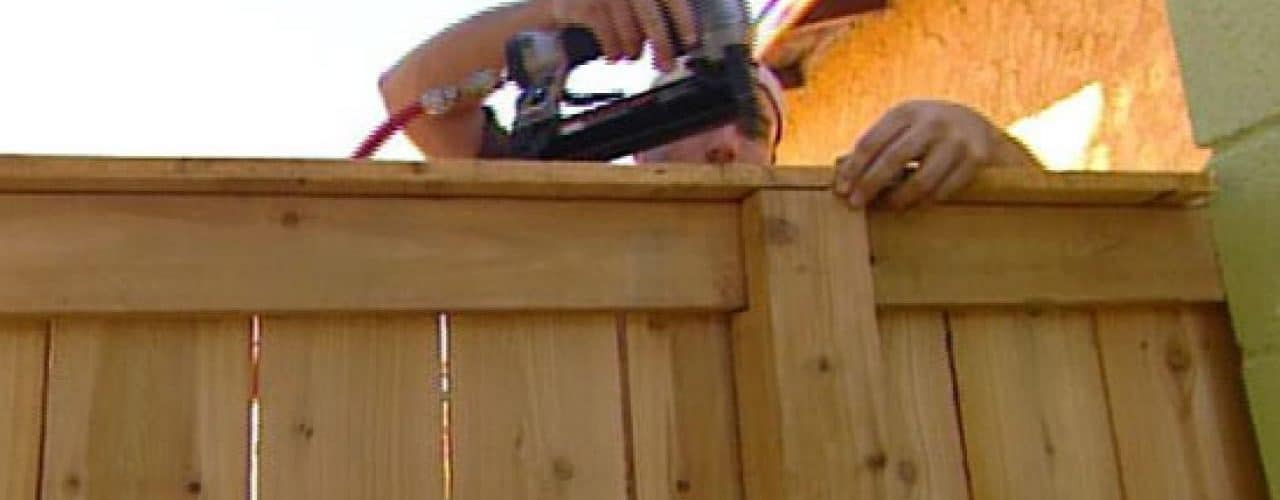
If you prefer a more finished appearance, attach the top rail to the post at the very top. Then you can nail another plank flat against the post and rails for a professional look.
Decide how you want to finish the fence. If you want to paint it, first waterproof it. Then apply primer and the top coat. A simple waterproofing is fine as well, but you’ll have to do it every other year.
Your fence will face direct sunlight, rain, wind, snow, and whatever the neighbors can throw at it. Build it carefully and take care of it for years of privacy and enjoyment.

