Step 1. Collect the tools and supplies that you will need to plant your rose bushes. This includes your chosen rose bushes, a shovel or spade, plenty of peat moss or composting material, sand when needed, a pair of hand pruners, top soil as needed, water, pruning paint and the loose soil from the hole you will need to dig.
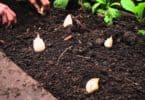
Step 2. Planning where you want to place your rosebush. You will need to plan where you want to plant your rosebush. An ideal area for doing this is a place where the rose bush would get at least six hours of constant sunshine every day. When you have found the right spot you will need to dig the hole for your rosebush using your shovel or spade. The hole that you dig will need to be large enough to give the roots of the rose bush plenty of room to grow.
Step 3. Add peat moss or your composting material to the dirt that is in the hole that you have dug for the rose bush prior to planting it. If you have soil that is excessively moist you will want to also add sand to the soil before replacing it back into the hole. This will help to drain the water so that your plant does not experience root rot which is caused by too much water.
Step 4. Examine the roots of your chosen rosebush. It is important to examine the roots of the rosebush after it is placed in the hole. You will need to use your hand pruners to clip away andy dead or broken roots that you may notice to help the rosebush replenish these roots.
Step 5. Form a cone in the hole. Use the top soil that you purchased to make a cone shaped form in the bottom of the hole that you dug out for the rosebush. Spread the roots of the rosebush over the cone in an evenly pattern. This will help to support the roots of the rosebush and help it take quicker. This is one of the reasons it is important to make sure that the hole is large enough when it is dug. It also helps to provide the room necessary for the rosebush roots to create a stronger holding.
Step 6. Set the right depth. You will need the set the depth properly for your rosebush. Most heartier rosebushes will have at least three strong shoots that will sprout in the rooting area. You will need to cover the know that is located just below these three shoots at a depth of 1 inch.
Step 7. Pack your soil. Fill in your hole where you have planted the rosebush with enough loose soil to cover the roots. Use the soil that is from digging. Make sure that you pack the soil very firmly around the root area of the rosebush. Fill the entire hole to the top with water and allow it to soak in to the ground around the rosebush. Refill the hole the remainder of the way with the rest of your soil. Make sure that you pack the dirt around the rosebush to help support it in place.
Step 8. Prune your rosebush. Using your hand pruners prune the rosebush once it is planted. The scale for pruning is as follows:
Hybrid tea rose bushes should be cut back to a length of six to eight inches.
Floribundas rose bushes should be trimmed back to a length of four to six inches in length.
Make sure that once you have trimmed your rose bushes that you spray the pruned areas with your pruning paint. This will help prevent any damage or disease caused from insects and plant viruses.
Step 9. Wait at least twenty four to forty eight hours before applying fertilizers to the newly planted rose bush. Make sure that you give the rose bush plenty of attention by watering and pruning it as necessary.
References:
Helpful Gardener: Planting a New Rose
<>