To understand the process of ironing, one needs to be aware of the various items needed for ironing. Basic supplies include an ironing board, an iron, and hangars.
Ironing Board Basics
There are three main types of ironing boards to choose from. These can range from portable, tabletop, and wall-mounted. While they all do the job of keeping the clothes flat for ironig, they each have their own advantages and disadvantages.
Portable ironing boards are the most common in the everyday house. They are convenient because they can be moved from room to room, can be height adjusted, and usually have a separate area for holding the hot iron. A disadvantage is that it is big in size and storage space may be a problem, especially if space is limited.
Tabletop ironing boards are popular for homes with small spaces such as apartments or college dorms. They are convenient due to thier small size, ease of portability, and do not require much storage space. The downside is that they are small and it may be difficult to iron larger items.
Wall-mounted ironing boards are ideal for those with limited space, though they are popular with larger homes too. These ironing boards can be mounted on a wall or the inside of a door.
Types of Irons
An iron is a small appliance which has a flat metal surface and a handle. Upon being heated, it emits enough heat or steam to help straighten wrinkles which may form in clothing. There are many different types of irons and some of these include the dry iron, the steam iron, the steam/spray iron, the steam spray shot iron, and the steam generator iron.
The basic ironing techniques are relatively simple. To prepare the iron, plug it in, allow it to heat up, and fill the water reservoir with cool water. Before ironing, always check the tags on the clothing as this will give you an idea of the fabric at hand. Some clothes can be ironed and some shouldn’t be ironed at all. Irons have different settings for different types of fabrics. Cottons have good results on high heat, wools on medium heat, and nylon, polyester, and silk on low heat.
Ironing a Shirt
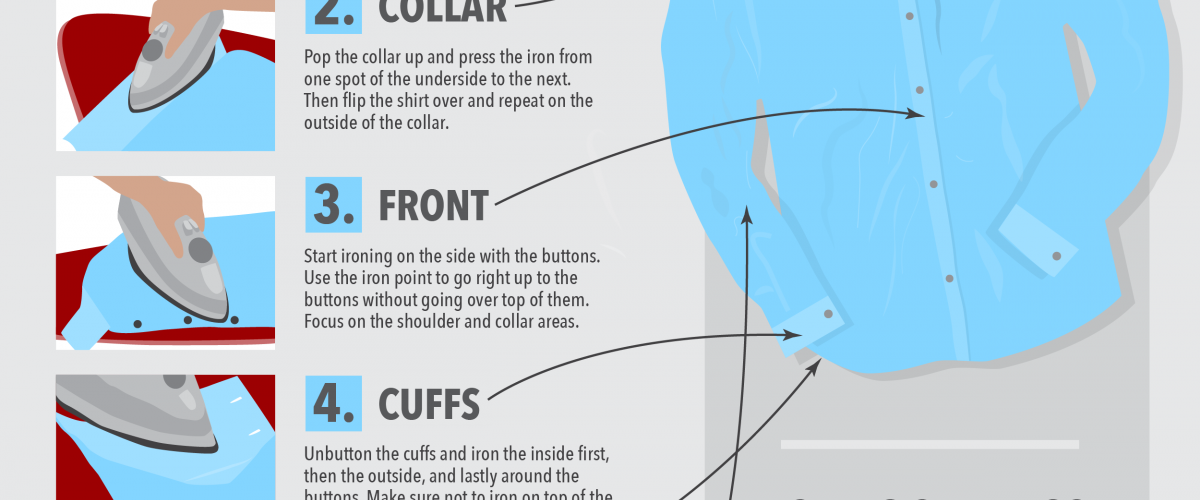
Always iron a shirt unbuttoned. The first place to start is at the collar. With the collar lying flat , iron it front and back. The next area to be ironed is the yoke. The yoke is the area which joins the collar to the main portion of the shirt. Using the pointed end of the ironing board, iron one side of the yoke first then switch to the other side. Once this is done, move on to the sleeves. The sleeve should be placed along the long length of the board. Starting with the cuff, iron it front and back and move on to iron the sleeve from cuff to shoulder, front and back. Once both sleeves are finished, iron the body of the shirt. This is done by using short, easy strokes from top to bottom. Once the ironing is done, hang the shirt on a hanger, buttoning the top and middle buttons. This will help in preventing wrinkling.
Ironing Pants
When ironing pants, it is best to start by placing the legs together and lining up the seams from the bottom hem. This will ensure a straight crease on the pant leg. Keeping the pant legs together, lay them down on the ironing board. Take the top pant leg and fold it over top to move it out of the way. At this point, iron the bottom leg, top to bottom and at the creases. Once one side is done, turn it over and repeat the other side. Repeat the process for the other pant leg. Always hang the pants up when done to prevent wrinkling.
<>


