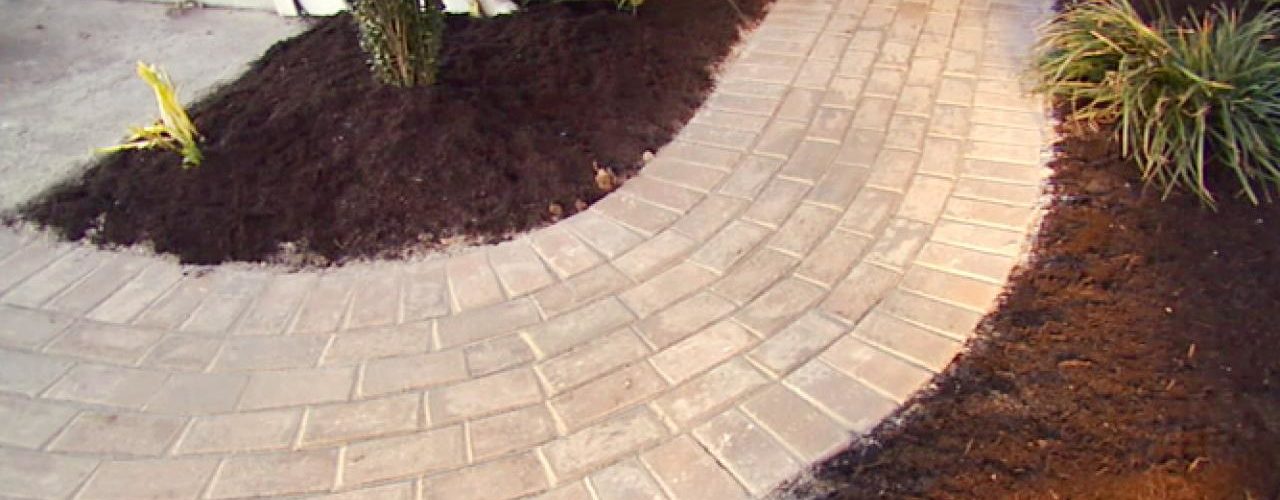
For any reader who has a concrete walkway and is looking to upgrade it to a higher end, nicer looking surface, a brick walkway should be considered among the options. Utilizing pavers, or bricks, in order to improve a house’s walkway certainly grants a touch of elegance which asphalt and concrete can not touch. Besides this, bricks come in a simply unbelievable variety of colors which are certain to complement practically any house’s existing color scheme. It may surprise you to learn that putting in a brick walkway does not need the expensive services provided by a contractor at all. Using only basic knowledge, a bit of hard work, and a couple of rental tools, you are able to put in your own brick paver walkway. This article goes through the step by step directions for properly installing a brick walkway.
Contents [hide]
Materials and Items Necessary for the Project:
– Tiny aggregate gravel
– A Power Compactor
– Pavers or Bricks
– Working Gloves
– A Push Broom
– A Shovel
– Brick Edger Strips
– A Hammer with Chisel, A wetsaw or a circular saw including masonry blade
– Stone Dust or Masonry Sand
– A Level
– A Wheelbarrow
– Knee Pads
– Eye Protection
Prep. Work for the Brick Walkway
This moderately challenging project has a variety of preparation work tasks which must be done in advance of actually laying down the brick pavers walkway. First you will need to employ a string line along with wooden stakes, or alternatively a garden hose, in order to properly outline the place which the walkway will occupy. Mark down this outline using flour or spray paint. Do not forget that any curves present in the walkway itself will need bricks specially cut down to size. Such craftsman like work certainly increases the complexity and and time required to complete the project.
Picking Out the Materials for the Brick Walkway
Pick out the pattern which you will utilize in your walkway. Once this has been accomplished, you are able to figure up the materials which you will require to finish the job. There are relatively simple formulas for determining these quantities of bricks needed. First you will have to figure up the number of square feet to be covered. To do this, simply multiply the width by the length. Assuming the walkway is straight, this is simple. If it is not straight, then just break down the walkway into even length by width sections, and then figure up the square footage of every section, so that you can sum them up. The home improvement store will be able to tell you how many bricks you need in particular when you give them the precise square feet measurements.
Preparing the Brick Walkway Site
Now it is time to begin preparing the ground where you will lay down the brick walkway. Begin by digging the area for the walkway to an eight inches deep point. To do this, utilize an edger or a straightedge shovel so that the sides will be straight. Then you will want to get out any roots or loose lying rocks before pouring in approximately four good inches of tiny aggregate gravel for the path. Be sure to tamp this down using a rented compactor.
Next you will need to put in one inch pipes aside both sides of the walkway itself. Make certain that these are fully leveled, utilizing a carpenter’s level which is affixed to a board. Pour in around two good inches of stone dust or masonry sand on to the walkway.
Put a board over the walkway on top of the pipes. Slide this board in the direction of the length of the planned walkway. Make sure that you level the stone dust or sand which underlies it. Compact down well the leveled base.
Installing the Bricks on the Walkway
Now you are ready to put in plastic brick borders. These will go around the walkway’s edges. Utilize twelve inch nails which are galvanized to drive these right into the ground itself. Such borders are helpful in keeping the bricks in their places, and to keep the walkway from spreading out.
Put down the bricks as per your pattern. Lay the bricks down on the compacted and leveled sandy base. Do not force them into the sand, as they will not stay level. Making certain that the brick rows actually interlock with one another is the most important part of achieving a solid walkway final product. Be sure to check out the adjacent rows, which should be staggered by a good half brick in order for the seams not to line up together. Once the bricks have each been put down, sweep stone dust or sand into the brick joints. Finally, the last step is to run the compactor along the whole walkway.
Additional Resources:
Home Addition Plus: Brick Walkway Installation


