Placing ceramic tile flooring within a room around your home can turn a dull environment into a room filled with style and sophistication. The key to doing this is choosing the right ceramic tile flooring, making the right preparations and making sure that the tiles are laid correctly.
Preparing Your Floors When Installing Ceramic Tile Flooring
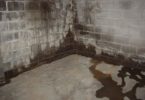
Laying a ceramic tile floor requires some planning and preparations prior to installation. You will want to make sure that your floors are level, clean and squeak free to give you the best final results. The couple of hours that are needed in preparing your floors for the installation of a ceramic tile floor can save you a great deal of time and money in the end.
Step 1. You will need to make sure that all of the old flooring is removed. If there is currently a carpet style flooring within the room where the new ceramic tile floor is to be laid you will need to remove the carpeting remnant, padding and any tack boards that may be used to hold the carpet in place. The simplest way to remove old tack boards is to pry a screwdriver underneath of the board and pull upward. This should give you enough room to get the claw side of a hammer in there and remove the nails holding the tack board in place. Make sure that you use extreme caution when handling the tack boards as they can cause serious injuries.
Step 2. If there is currently a tile or laminate style flooring currently in the room where the ceramic tiles are to be placed you will need to use a putty knife to scrape them up. Get as much of the glue or adhesive as possible. Use a handheld sander with a medium grit paper to sand down any areas of adhesive that cannot be removed otherwise. This will help to insure that the ceramic tiles will lie flat against the surface of the sub flooring and you will not end up with uneven tiles that do not look very nice.
Step 3. . If you have areas in your sub floor where two pieces of wood meet for the sub flooring that are not flush with each other you will need to sand the edges of the wood so that they are. Do not over sand this area as you will create an unstable surface making it possible for your ceramic tiles to break and chip.
Step 4. Using a marker walk around the entire surface of the sub flooring to locate areas that may be noisy or squeak. When you have the entire room marked you will need to go back and either nail or screw the sub flooring down in these areas. Make sure that you are working with nails and screws that are long enough to go through the entire sub floor and into the floor joists.
Installing the Ceramic Tile Flooring
Step 1. There are two ways to install your ceramic tile floor. The first option is to lay it and leave a gap between the tiles which will be filled in with grout. The second option is to lay the ceramic tiles so that are butted against each other without any space between them. When you have decided which option that you want to use you can begin your project.
Step 2. Using a level make sure that your base floor is level. This will guarantee the best possible outcome for your ceramic tile flooring when you are done. If you have areas that are not level you can use leveling compound to raise this area and bring it flush with the rest of the floor. To lay the leveling compound you will pour it in the area that is low. Use a trowel held at a 90 degree angle from the floor and work in an S-shaped pattern around the area. You will want to move side to side.
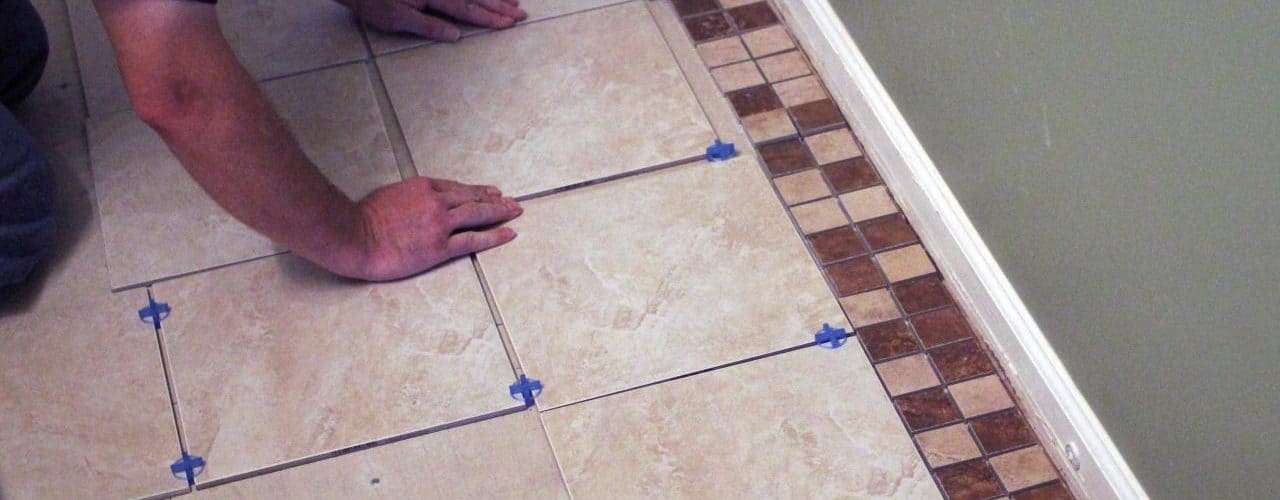
Step 3. When your entire floor is level you are ready to begin laying the tiles. You will first need to lay the tiles out without securing them in place. This will save you a great deal of time if you run into a problem area. Begin in one corner of the room. Place a ceramic tile to start your first row. This is the most important tile you are placing because if it is off just a little bit it can mess up your entire flooring installation. When you have placed your tile in the corner use your level and lay it again the edge of the tile facing you. You can use the level as a guide for placement. If you want to leave a space between the tiles you can purchase tile spacers at a local home improvement store to make this easier. Continue working in this fashion.
Step 4. When you come to areas where you need to shape your ceramic tile to fit around corners or other odd shaped areas you will either need to use a hand grinder to help cut out the shape needed or you can use a tile cutter. Try to work as delicately as possible because ceramic tiles can break very easily if given the right conditions.
Step 5. When you have all of your tiles in place you can use your tile adhesive or glue. Make sure that the entire back of the tile is covered however, make sure that the glue is not so thick that it will cause the tile to stick up unevenly. Press down firmly on the entire tile for about 30 seconds to make sure that it will stay in place. Applying the right amount of pressure is important as not pushing firmly enough may cause a bad bond and applying too much pressure can actually crack or break the ceramic tile.
Step 6. If you have left space between your tile you will need to fill this area in with your chosen grout. Apply the grout directly into the space working one small section at a time. Using the end of a popsicle stick or your finger tip push the grout down and into place. Wipe out excessive grout to form a smooth line between the tiles. Make sure that if you get grout on the tile you wipe this off immediately as it will become too difficult as it dries.
Step 7. Allow at least forty eight hours for you ceramic tile floor to set before allowing excessive traffic into the area.