
With the many existing forms of roofing that a homeowner can put on his roof, why would he shy away from the more traditional forms of roofing in favor of a rubber roof? There are actually several practical reasons for electing to go with a rubber roof on the top of one’s house. Among the only surefire methods of defending low sloping roof sections from leaks which does not require the employment of an open flame or alternatively highly specific equipment on the wooden roof, rubber roofing is both useful and viable. Such rubber roofing is available in big rolls which are simply attached to the roof sub-surface, utilizing an adhesive and not nails. Since no nail holes result from this type of rubber roof installation, there is no place for standing water to enter the roof.
Contents
Materials Needed for the Project:
Push Broom
Roller
Rolls of Rubber Roofing
Special Rubber Roofing Adhesive
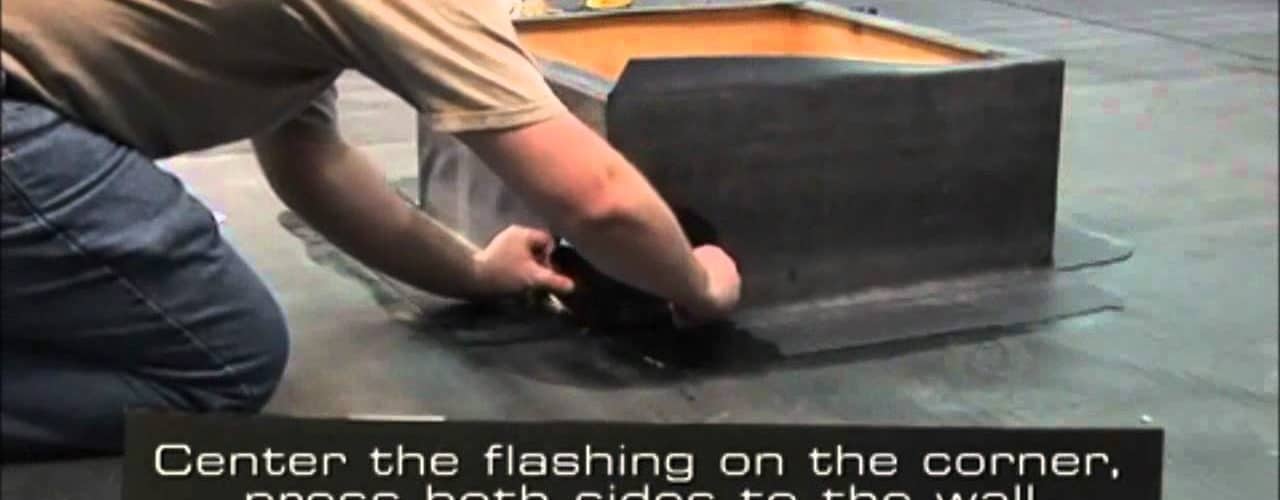
Prep Work
We begin by warning that this is a challenging project, and not one for a novice home improvement person. Before the rubber roofing material is put down, the existing roof surface must be removed of any and all nails and pre-existing shingles and shingle debris. Any encountered looser roof boards ought to be re-attached. Gaps which prove to be bigger than a quarter inch should be filled in with wooden strips. The rubber roofing membrane is not capable of covering gaps in excess of a quarter inch without the possibility of failing.
Rolling Out the Rubber Membrane
Begin at the roof’s bottom and start by rolling out the rubber roofing membrane from a side of the roof, all along the center of the roof, to the other side. Allow it to lie undisturbed for a full thirty minutes. Once this has been completed, fold the bottom half of the rubber membrane over on to the top half of the membrane. Utilizing a broom, sweep the now exposed deck of the roof and the rubber membrane itself.
Applying the Rubber Roofing Adhesive
Put the rubber roofing adhesive on to both the rubber roofing membrane, as well as the exposed deck of the roof, utilizing a roller. Carefully and gradually, unfold the rubber membrane back to its original location. To make sure that you get a strong bond of the adhesive, employ a stiff bristled push broom to force down the rubber membrane against the roof deck. Now do the same thing again, this time on the other half of the rubber roof membrane.
Attaching the Rubber Roof Membranes
Now, take out the next portion of the rubber membrane, and roll it out. Make sure that you permit a six inch overlap on to the piece beneath it. Such an overlap is critical in order for correct adhesion between the two sections to be assured, as well as to permit the water to naturally flow down from the top part of the roof all the way to the edge of the roof. Glue down this second piece exactly as you did with the first portion. In this manner, keep putting on sections, one piece at a time, until the entire roof is covered up with rubber roofing membrane. It is very important to remember that you should only put on this rubber roofing material if and when there is a zero percent chance or rain or other precipitation for at least the next three days. This is because the rubber roofing adhesive must be allowed a full forty- eight hours to dry effectively before it becomes completely waterproof.
For more information on the rubber roofing material involved in the project and the method of installing a rubber roof, navigate to the following websites, using these links: eHow or Yahoo Answers.
<>


