When individuals make the decision to create the feel of hardwood in their homes they will need to know how to install it. Installing the hardwood on your own is much cheaper than paying someone to do it for you. However, it is particularly pertinent to know what you are doing. This brief article will break this process down, into a few easy steps that will make the task much easier to complete. Please refer to http://www.hometips.com/diy-how-to/installing-hardwood-floors.html if you have questions, or concerns, when you are finished reading this article.
1.) Purchase 15-pound asphalt felt. This will need to be laid down on top of the subfloor before you put the hardwood floor down. You should also make sure that you are overlapping it by a few inches. Do this until the entire floor is covered. It will need to be tacked down by using a staple gun. This helps ensure that it will not move.
2.) Find the center of the room. Then, you will need to identify which wall you should be started first. Now, take the time to make chalk lines parallel with the starting wall. This job needs to be completed throughout the entire room. The lines should be even with the support members.
3.) It is essential to select the longest boards, or the widest boards, and start with them. You will need make sure that you are taking the time to pre-drill holes for the nails. Drill them down through the asphalt felt and the subfloor. Once you have completed this step, you will need to nail the first board down so that you have your starting point.
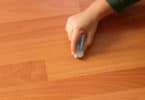
4.) As you begin the next row, you will need to take the hardwood flooring and place it within the grooves. Use a rubber mallet and smack the wood lightly. This is a terrific way to ensure that the flooring is extremely tight and close together.
5.) Continue to place the flooring. Make sure that the end joints are at least 6 inches away from each other when you look at the flooring pieces beside each other. You do not want to have the end joint in a straight line all the way across the floor.
6.) When you get to the final piece of flooring, you may need to use a pry bar in order to get the wood piece in closely. Just remember to pre-drill your holes. You will be able to use the markers that you found at the start in order to identify where your support members are. This is an excellent way to ensure that you are getting a secure fit.
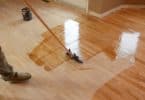
7.) Once you have all of the wood flooring down, you will be able to go around the room and apply your molding along the base of the walls. Do not forget that this will help cover any gaps that there may be along the walls.
8.) Purchase a reducer strip. It is crucial to make sure that you have one for each of the rooms surrounding the room that now has hardwood flooring. This will be needed in order to help level the step from one room, into the other.
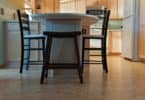
It is not difficult to install a hardwood floor, if you take the time to understand what you are doing. With a little elbow grease and some planning, your room can look beautiful and natural.
9.) Always take the time to set the nail heads below the surface of the hardwood flooring. This will make the project look much nicer when you are finished. It will also decrease the likelihood of any injury.
<>